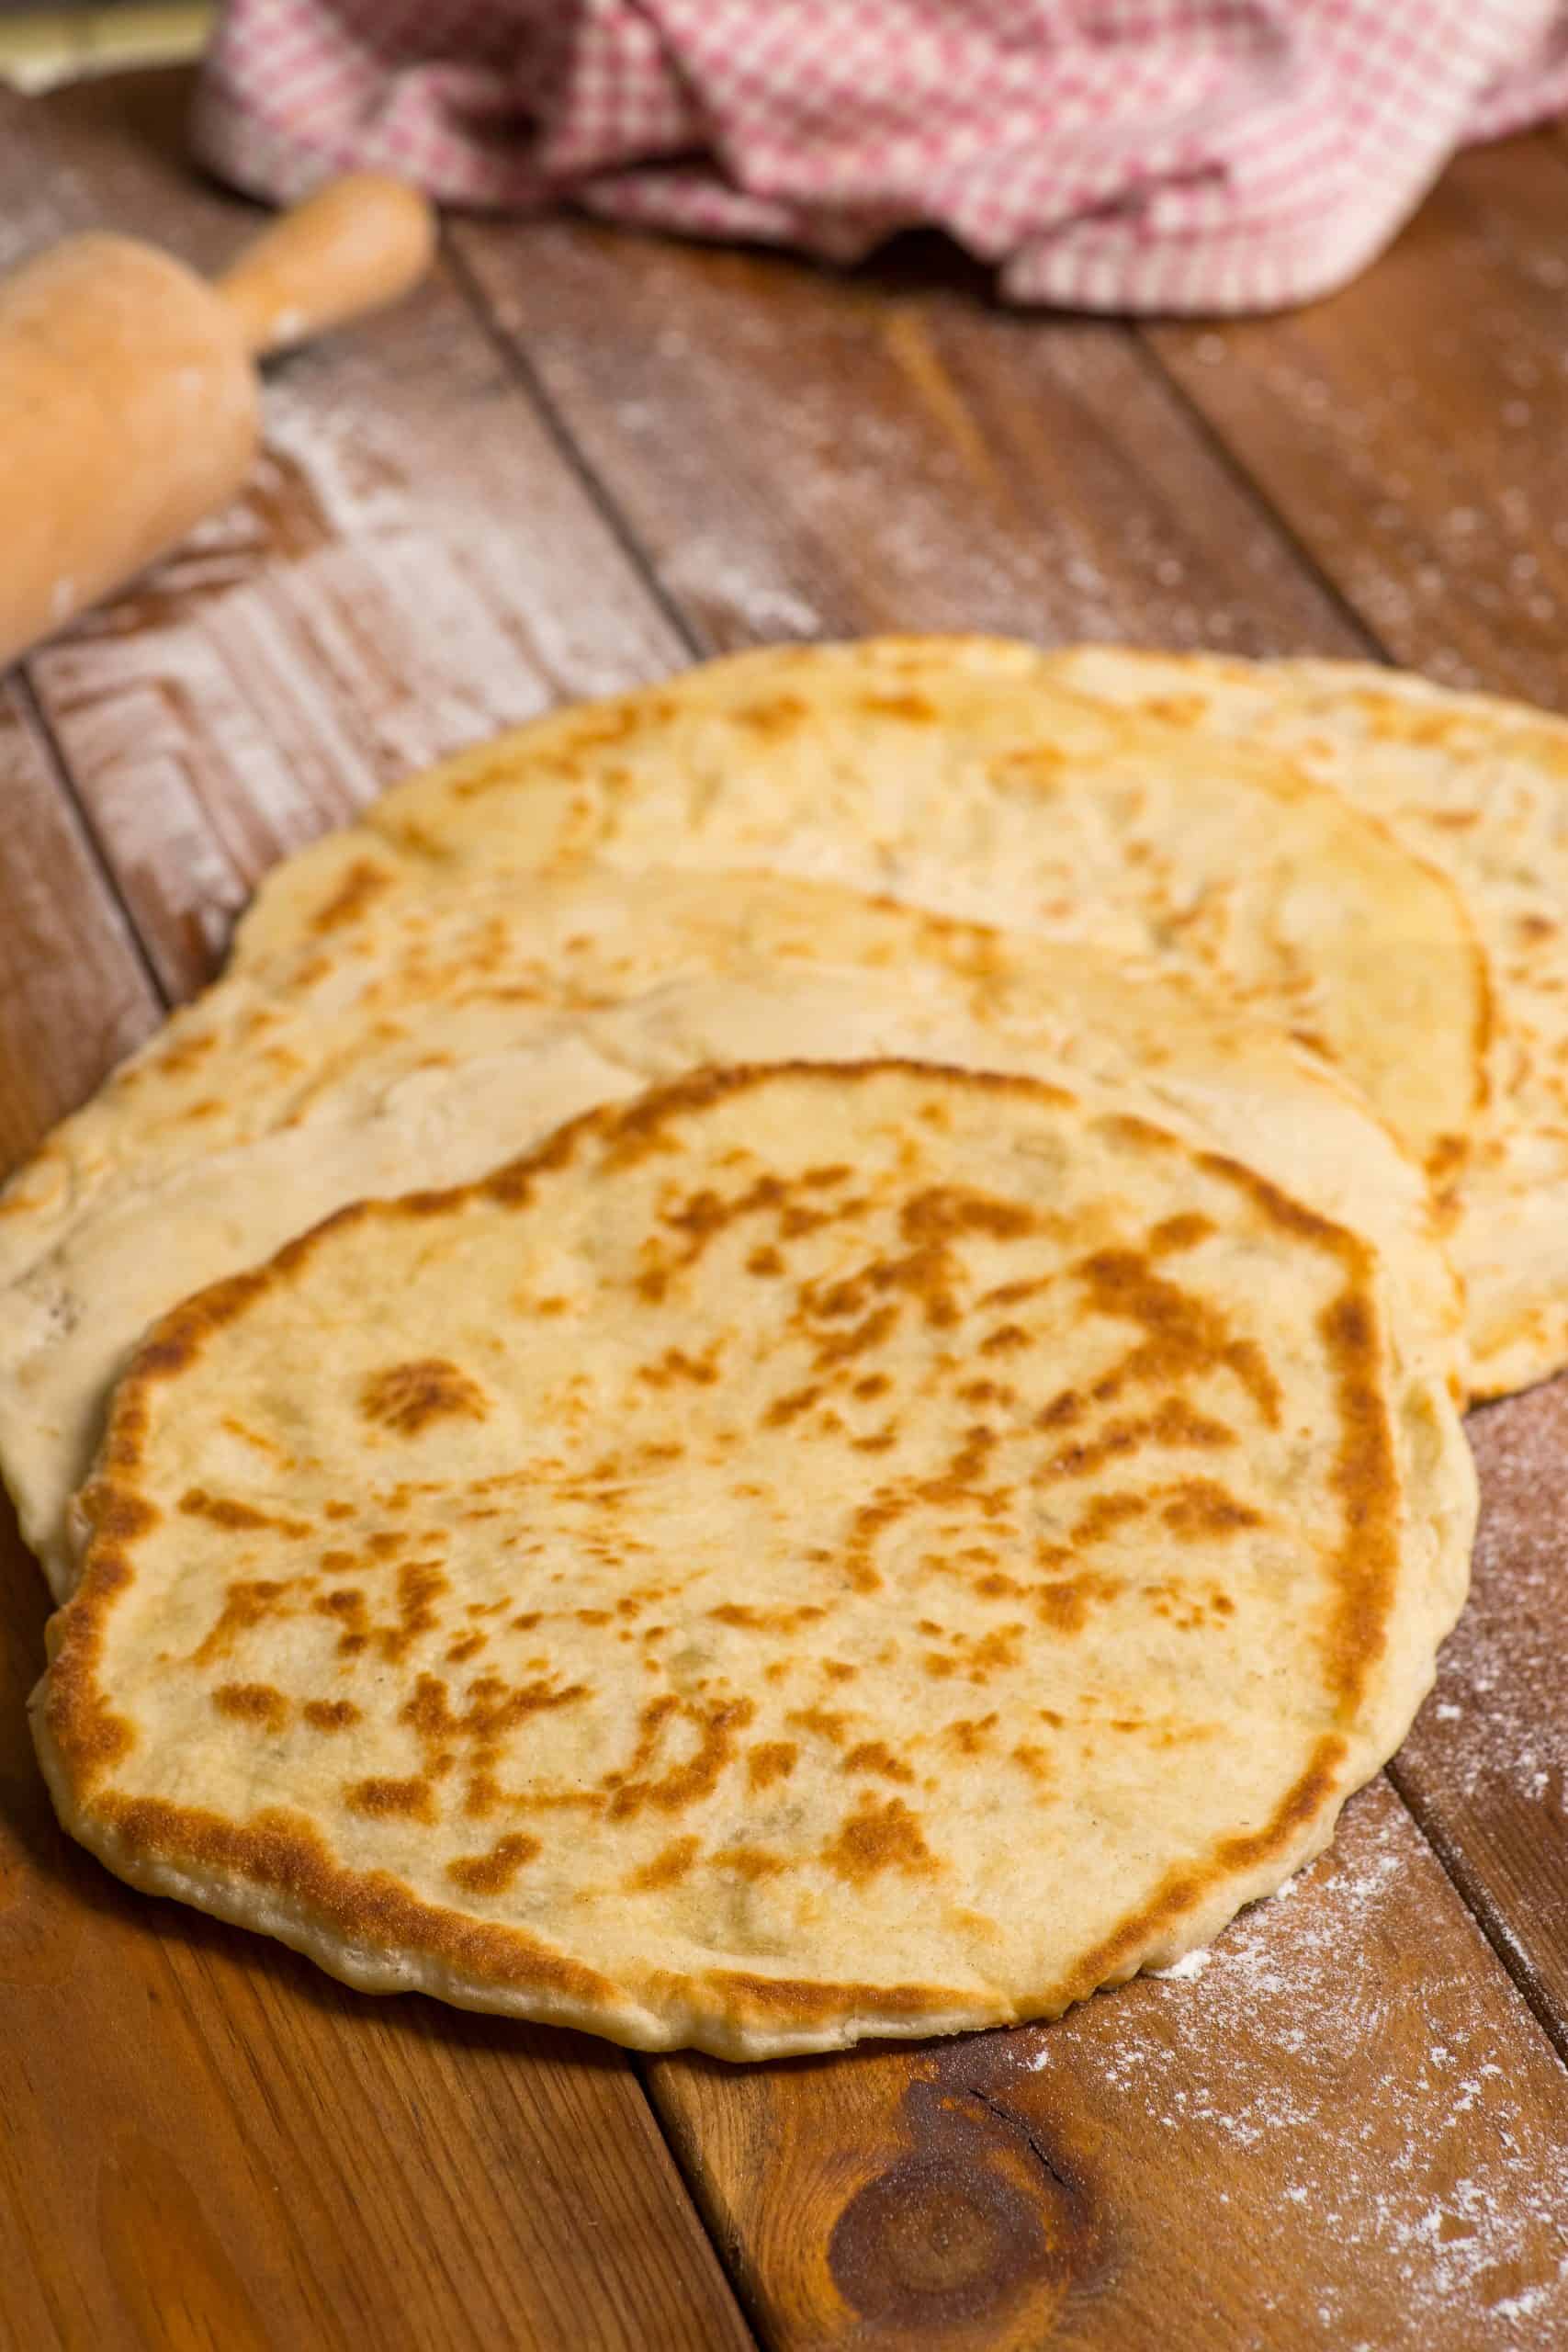
My very best homemade pita bread recipe! If you like your pita bread soft, fluffy, and authentic, then this super easy pita bread recipe is made for you!
And if you are wondering if it is worth making pita bread at home, the answer for me is very simple! Nothing compares to the smell of some fragrant, warm, golden brown, fresh, homemade pita bread! Trust me, after you make this easy traditional Greek pitta bread recipe, you will never buy the store version again!
So go ahead, read on to discover my tips and tricks to make this Greek flat bread to perfection, my video showing you how to make it, my delicious whole-wheat pita bread variation, my no knead bread machine shortcut, my tips on how to prepare in advance and store them and of course the recipe!
Homemade Pita bread recipe – A traditional Greek delight
Pita bread (from Greek: πίτα) is a Greek flatbread that is a staple of countless Greek dishes. It is a firm favorite to serve with any assortment of meze’s and dips and spreads, like melitzanosalata, fava, feta cheese dip, tzatziki, hummus, vegan tzatziki sauce and many others.
Together with Moussaka and the vegan moussaka with lentils, Greek Pita bread is one of the most well-known Greek dishes! Where from? Look no further than souvlaki, the most popular Greek street food!
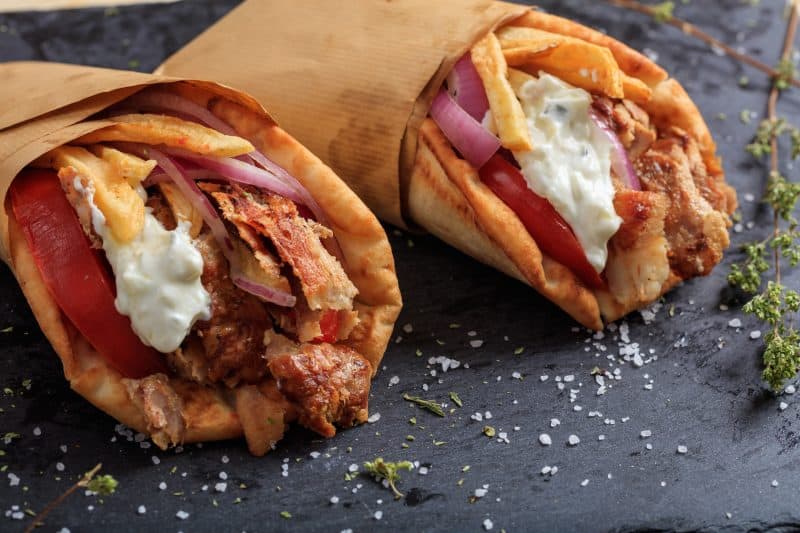
Souvlaki is nothing else than a pita bread sandwich, stuffed with a meat of your choice, a deliciously creamy tzatziki sauce, fresh, juicy tomatoes and zingy onion slices.
You’ll most commonly find Greek Pita breads served as a chicken souvlaki, pork souvlaki, beef souvlaki or lamb souvlaki, or even filled with some delicious lamb kofta kebab.
Also of course with the gyros variations, like pork gyros and chicken gyros, which is meat cut off in chunks from a spit. Who can really resist?
Traditional Greek Pita Bread Key Preparation Steps and Tips
Greek pitta bread is a very simple dish to prepare. In a nutshell, Greek pita is a plain, non-enriched dough which is left to proof and then pan fried in a skillet until fluffy and golden brown.
So, my very simple, step-by-step Greek pita bread recipe is summarised in the below three key steps:
- Prepare your pitta bread dough
- Shape your pita breads
- Cook them in your skillet
How to prepare your pita bread dough
A traditional Greek pita flat bread dough only needs 4 ingredients to make and the whole process is really simple. So lets get started!
Start by preparing your yeast: Dissolve your yeast in a bowl with the water and sugar and wait for it to froth. There are two reasons for this.
Firstly, and most importantly, it’s a great test to make sure the yeast is fresh and active and will get your pitta flat bread all nice and fluffy. Secondly, its ready to go and full of action when it’s mixed with the flour!
Knead your pita bread dough: Pour in your yeast mixture, flour and salt in a bowl and use your hands or a stand mixer to knead until its soft, elastic and a bit sticky.
If you find your dough being too sticky, before adding any extra flour, let the dough rest for 15-20 minutes and try handling it again. This will let the gluten in your pitta bread dough relax and make it easier to handle.
If your dough is still too sticky to handle, then add a couple of tablespoons of flour and knead for a bit longer.
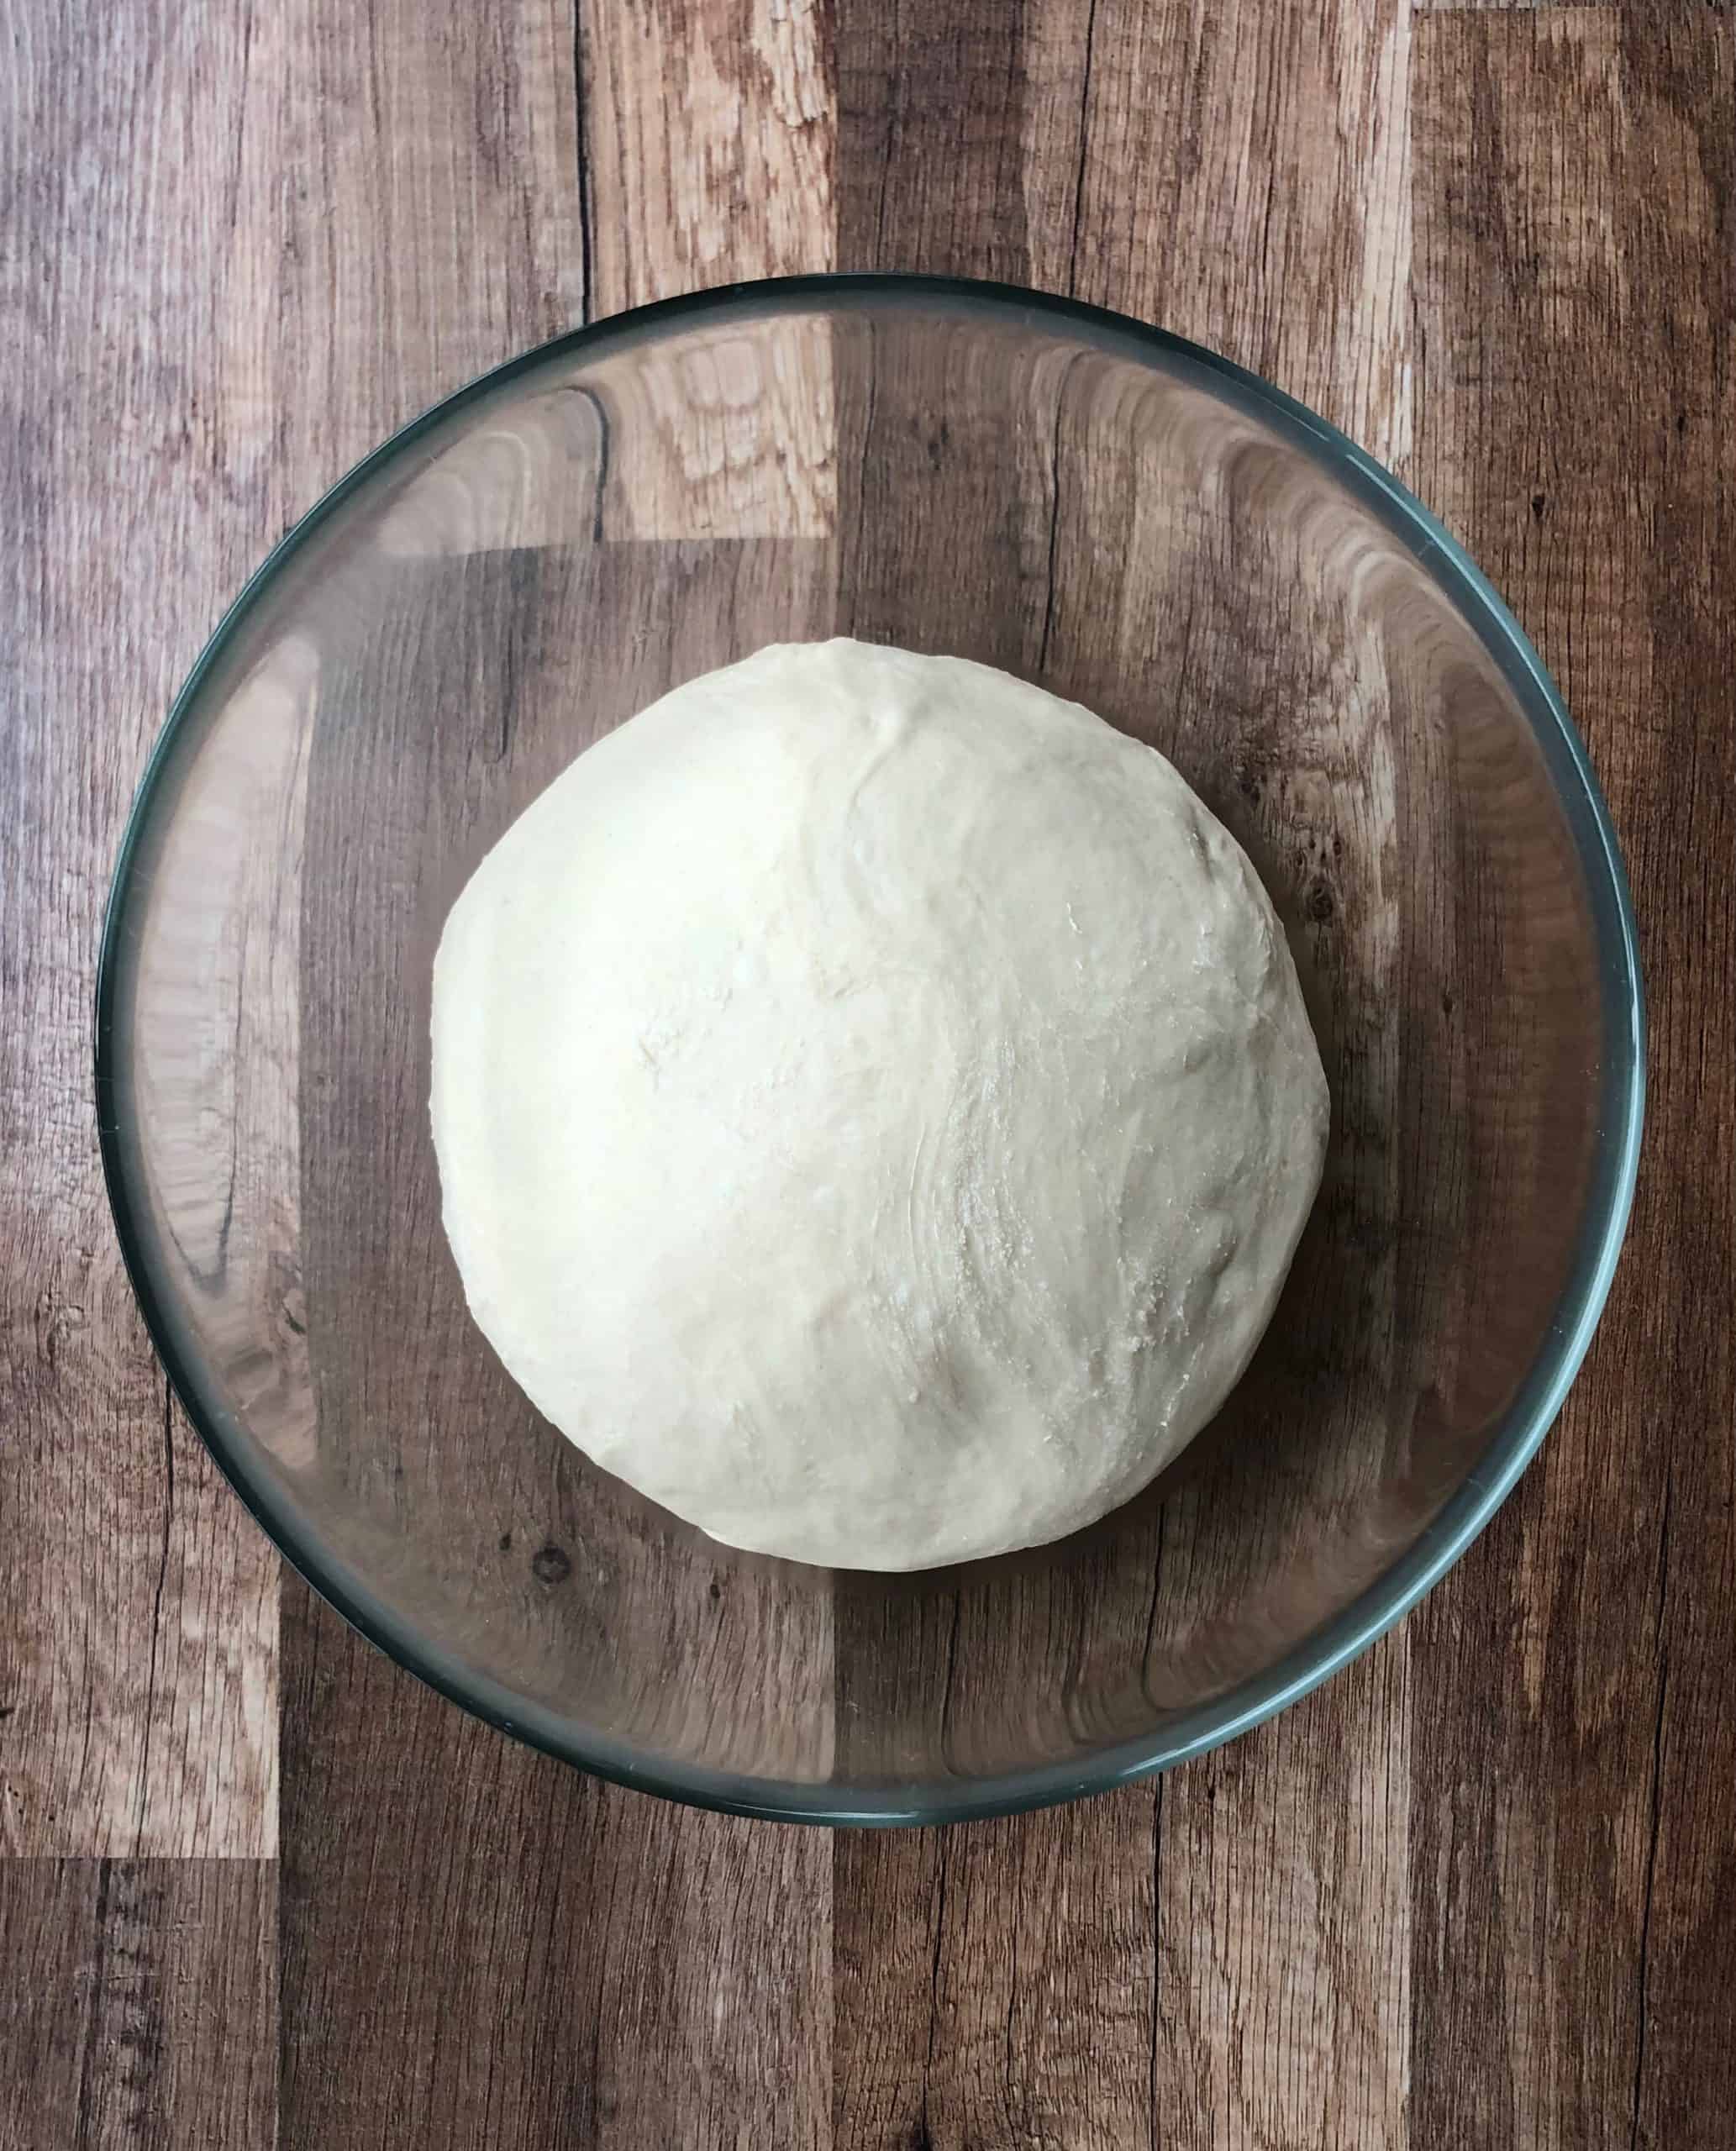
Let it rest in a warm place: Coat your dough with some oil to prevent it from drying out and then cover your bowl with a kitchen towel and some cling film and let it rest in a warm place. Your dough is ready when it has doubled in size.
If your home is a bit on the cold side, you can accelerate the proofing by putting your dough in your oven pre-heated to 40C/100F or with the oven light on only. This will kick start your yeast and make it proof faster.
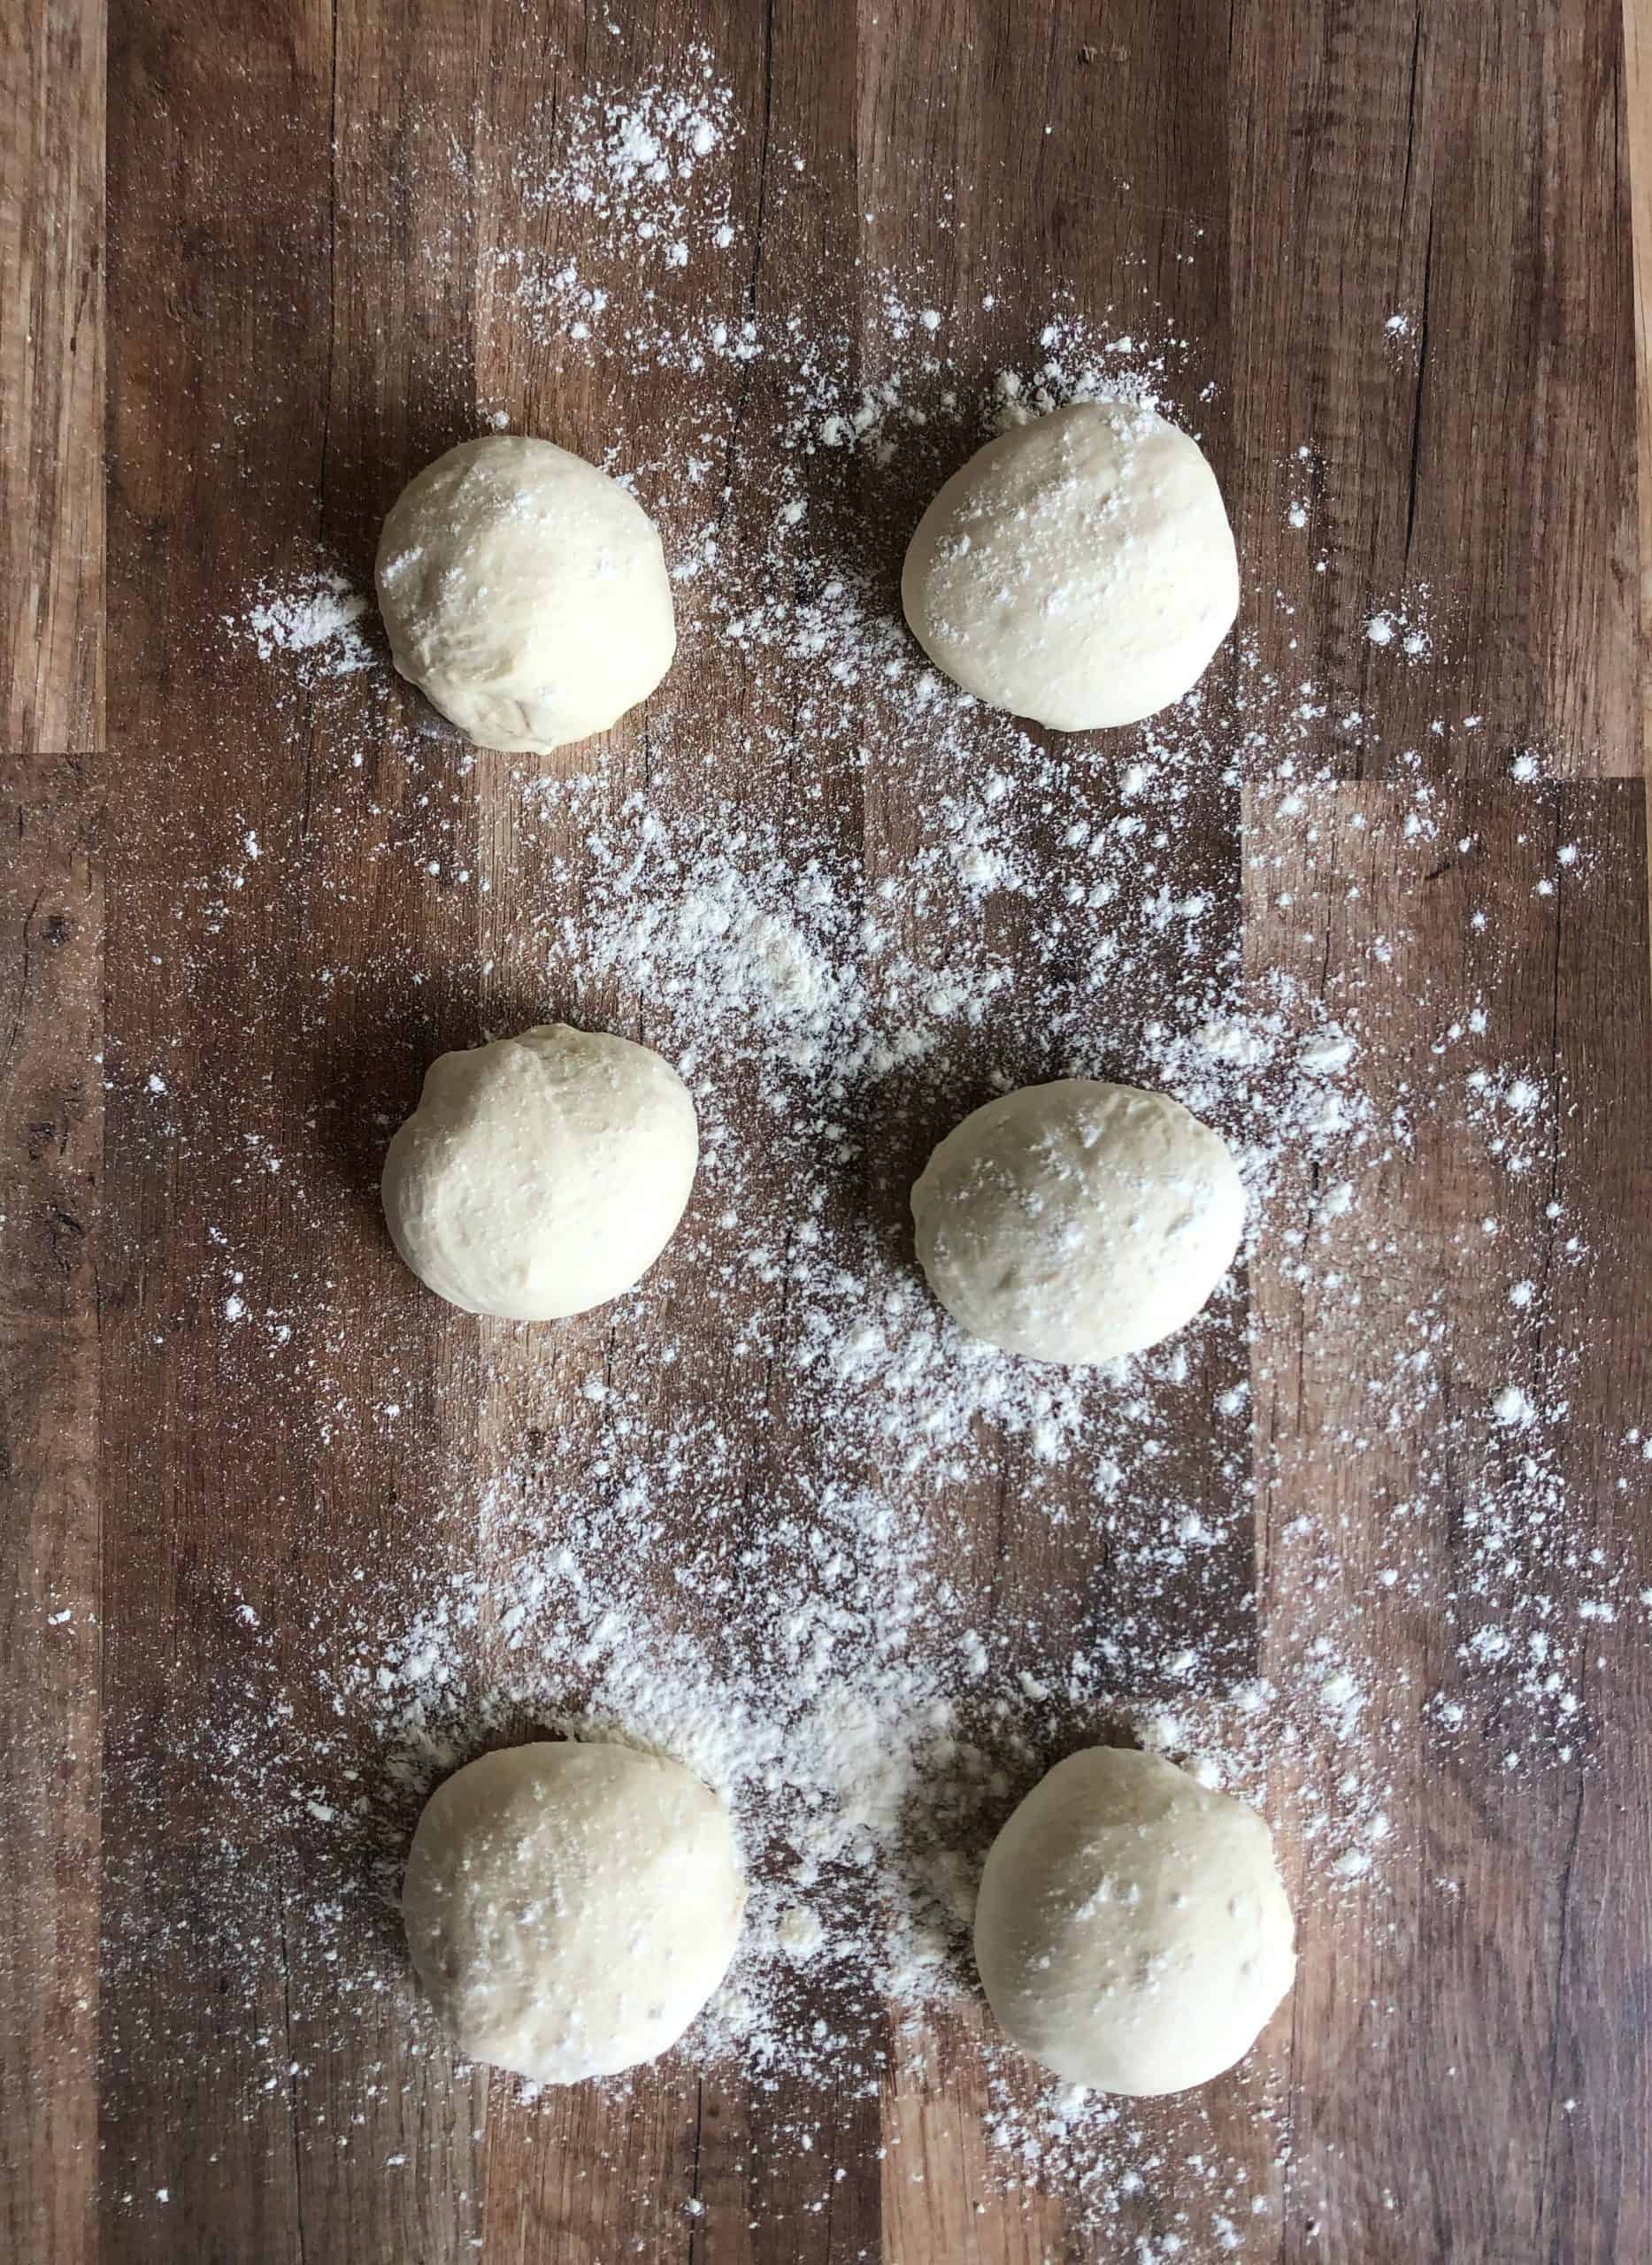
Split into portions and get ready to shape: After your dough is done rising, it’s time to shape your Pita breads. Gently deflate your dough, split into evenly sized portions, and shape them into some nicely tight balls.
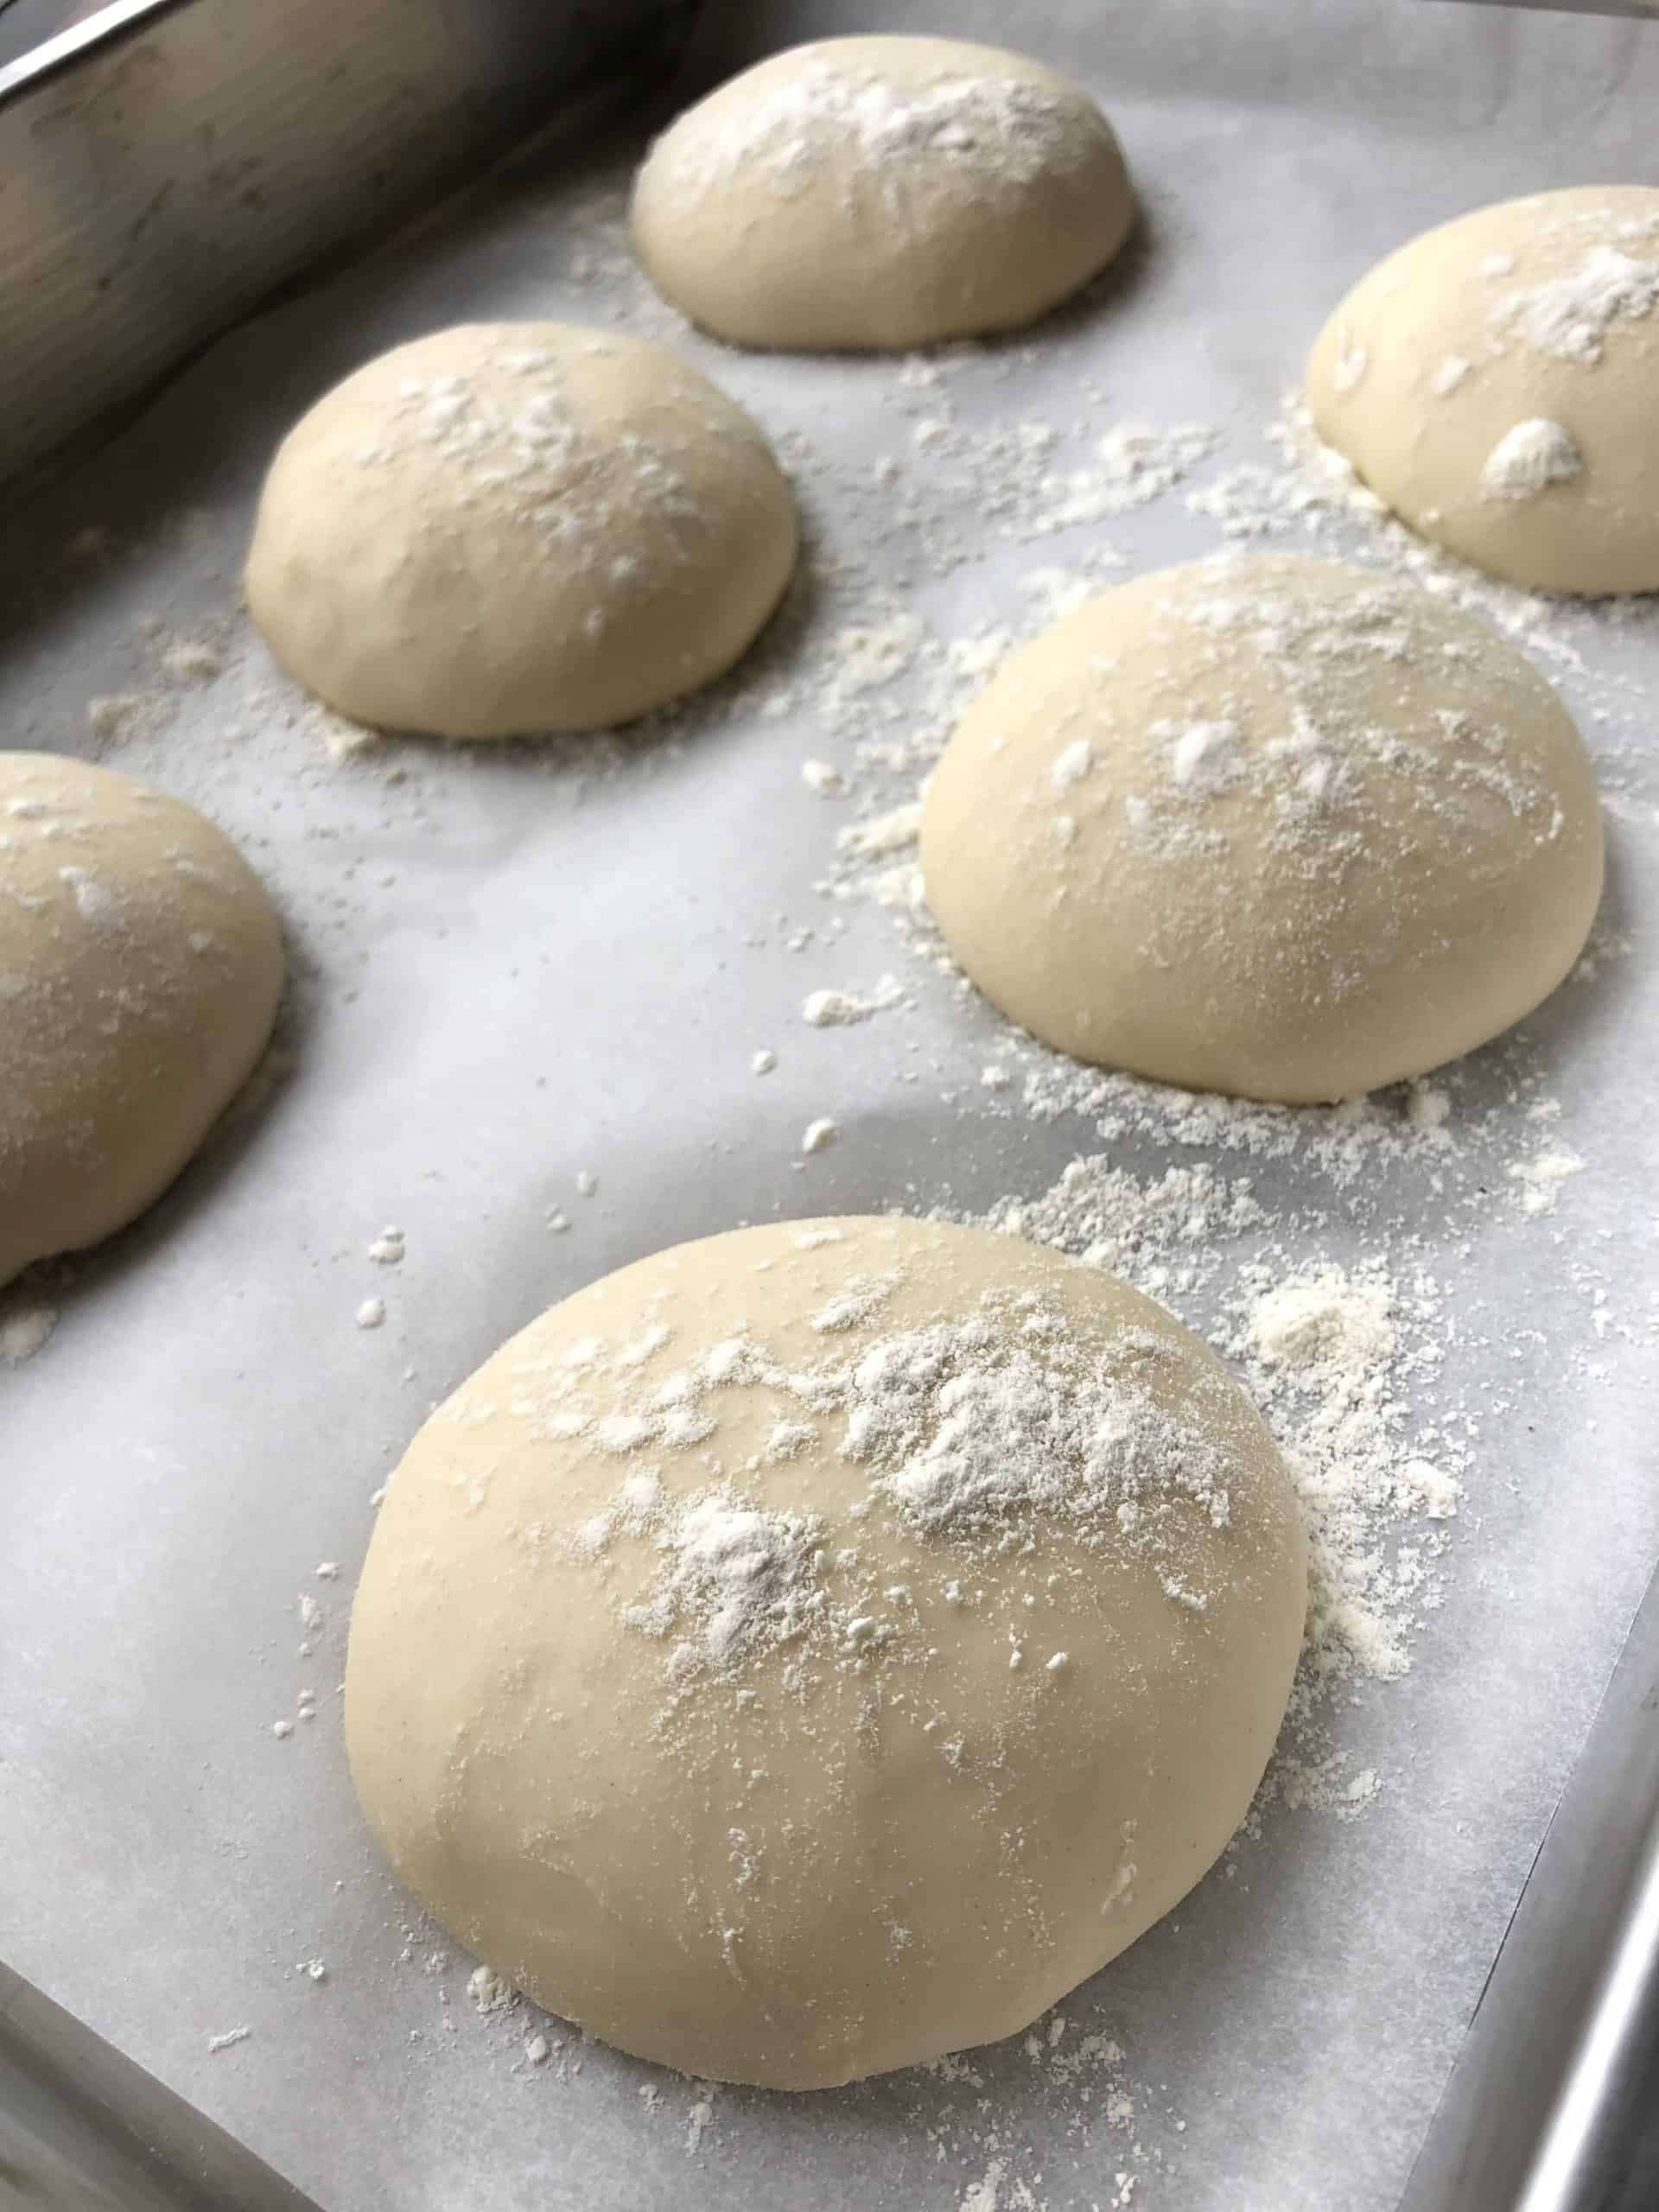
I use my kitchen scale to make sure I get 6 evenly sized balls out of my dough! Finally, let it rest for 15 minutes before shaping. This will relax the gluten and make your pita breads easier to spread and hold their shape.
How to shape your Greek pita bread
There are two tips that make all the difference when shaping your pita breads – rolling them out in evenly sized round disks and poking them with your fingers or a fork like a focaccia!
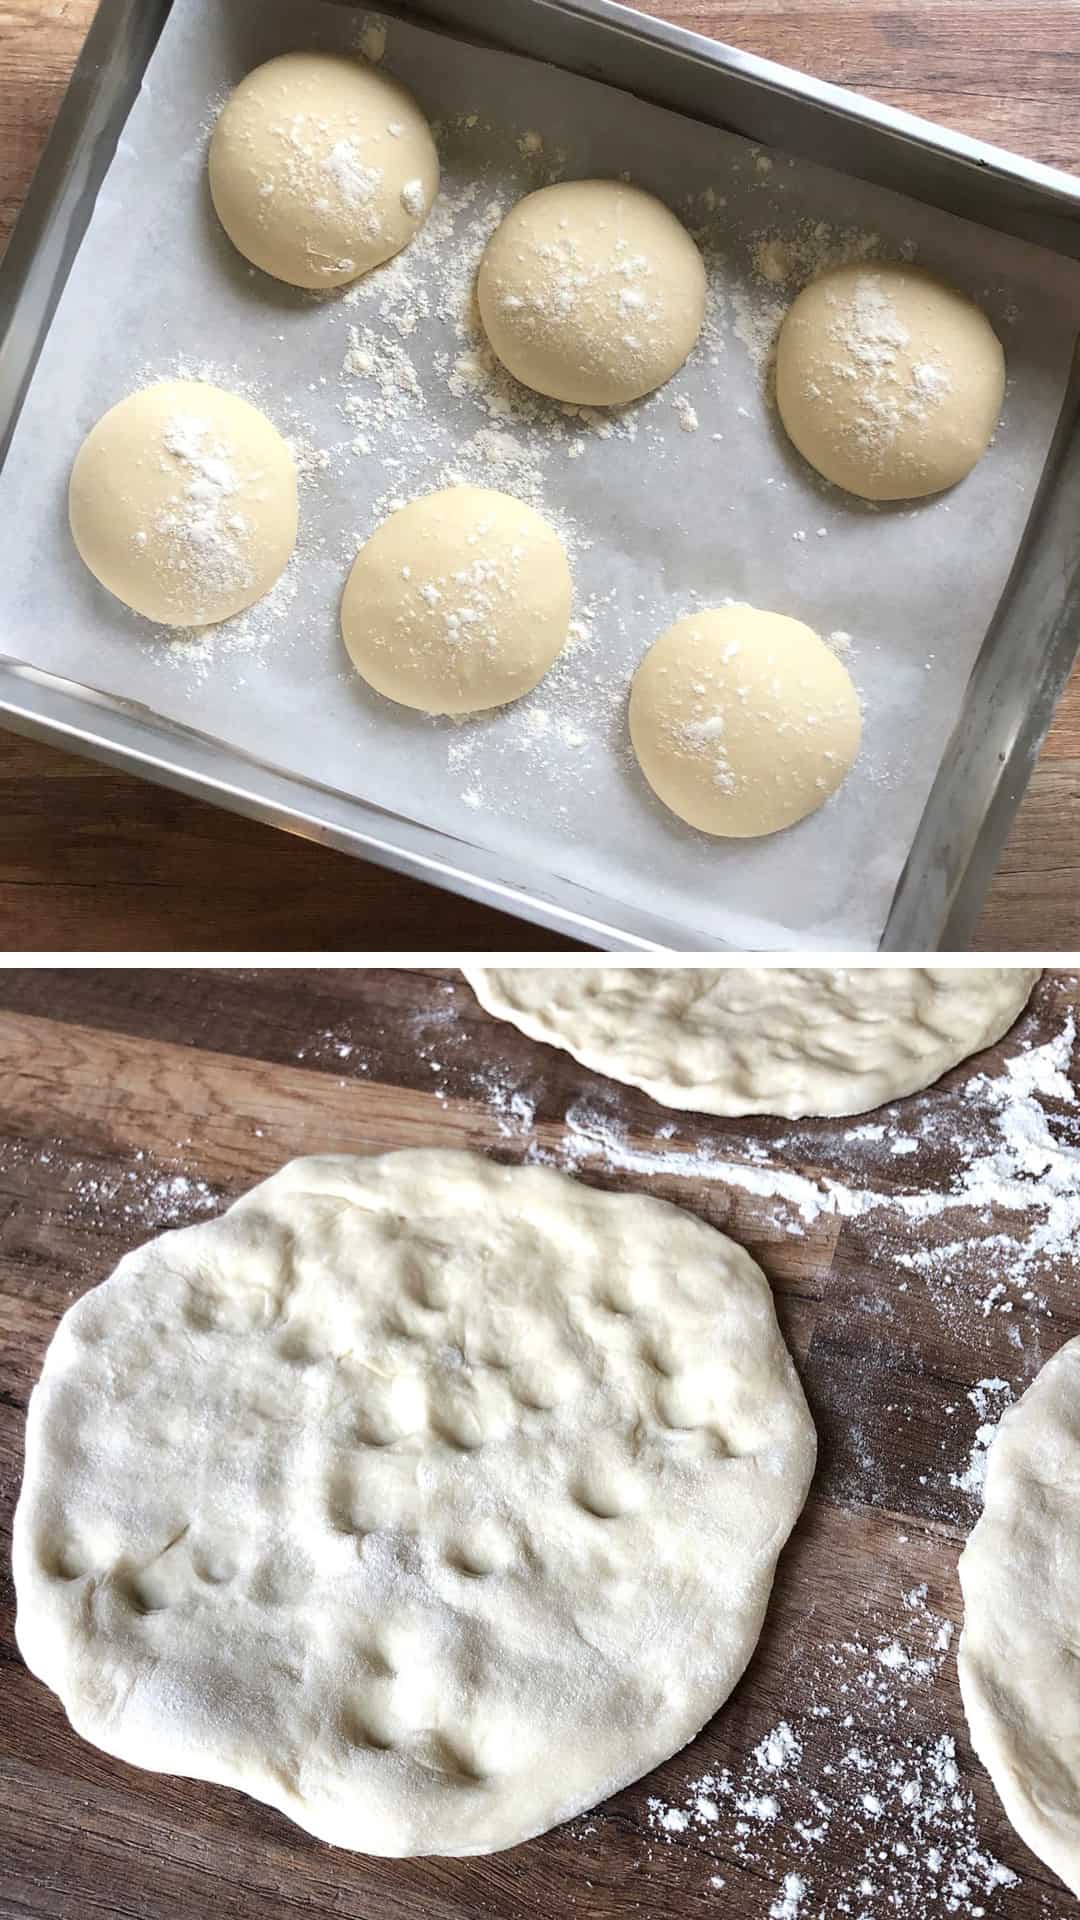
Shaping your pitta bread: Firstly, shape your pita bread in an even 20cm / 8-inch-wide disk. You can use your hands or a rolling pin to shape your pitas.
Using a rolling pin will result in a slightly crunchier pitta as the air is partially knocked out of the dough. On the other hand, using your hands to stretch it like a pizza base will result in more air in the dough and a fluffier pita bread
If the dough springs back, let it rest for a few minutes and try again – its gluten just needs some time to rest.
Poking the all-important holes: What visually distinguishes a Greek pita bread from a traditional flatbread are its dimples! They help create pockets of fluffiness and areas where the pita is crunchier as well as create space for your dips to sit in when served! So, go ahead and poke some dimples by pressing down firmly with your fingers or with the back of a fork!
How to cook your Greek pitta bread
The best way to cook your traditional Greek Pita bread is in a non-stick, heavy pan that comes with a lid. You want the pan to keep its temperature while cooking and its lid to lock the steam in.
There are two ways to cook your pita. The fast way – straight in the pan, or the slow but fluffier way, with steam in the pan.
For the fast way, you’ll need to:
- Preheat your pan on medium heat: You don’t want your pitta to cook too quickly on the outside so make sure the pan is not too hot!
- Use a little bit of olive oil: Don’t overdo it. Just a splash is enough! Use a kitchen towel to wipe the pan down if you’ve added too much.
- Use your pan’s lid! Cover the pan to lock the steam in the pan. This will make the pita bread very soft and fluffy while also giving it a delicious, caramelised crust!
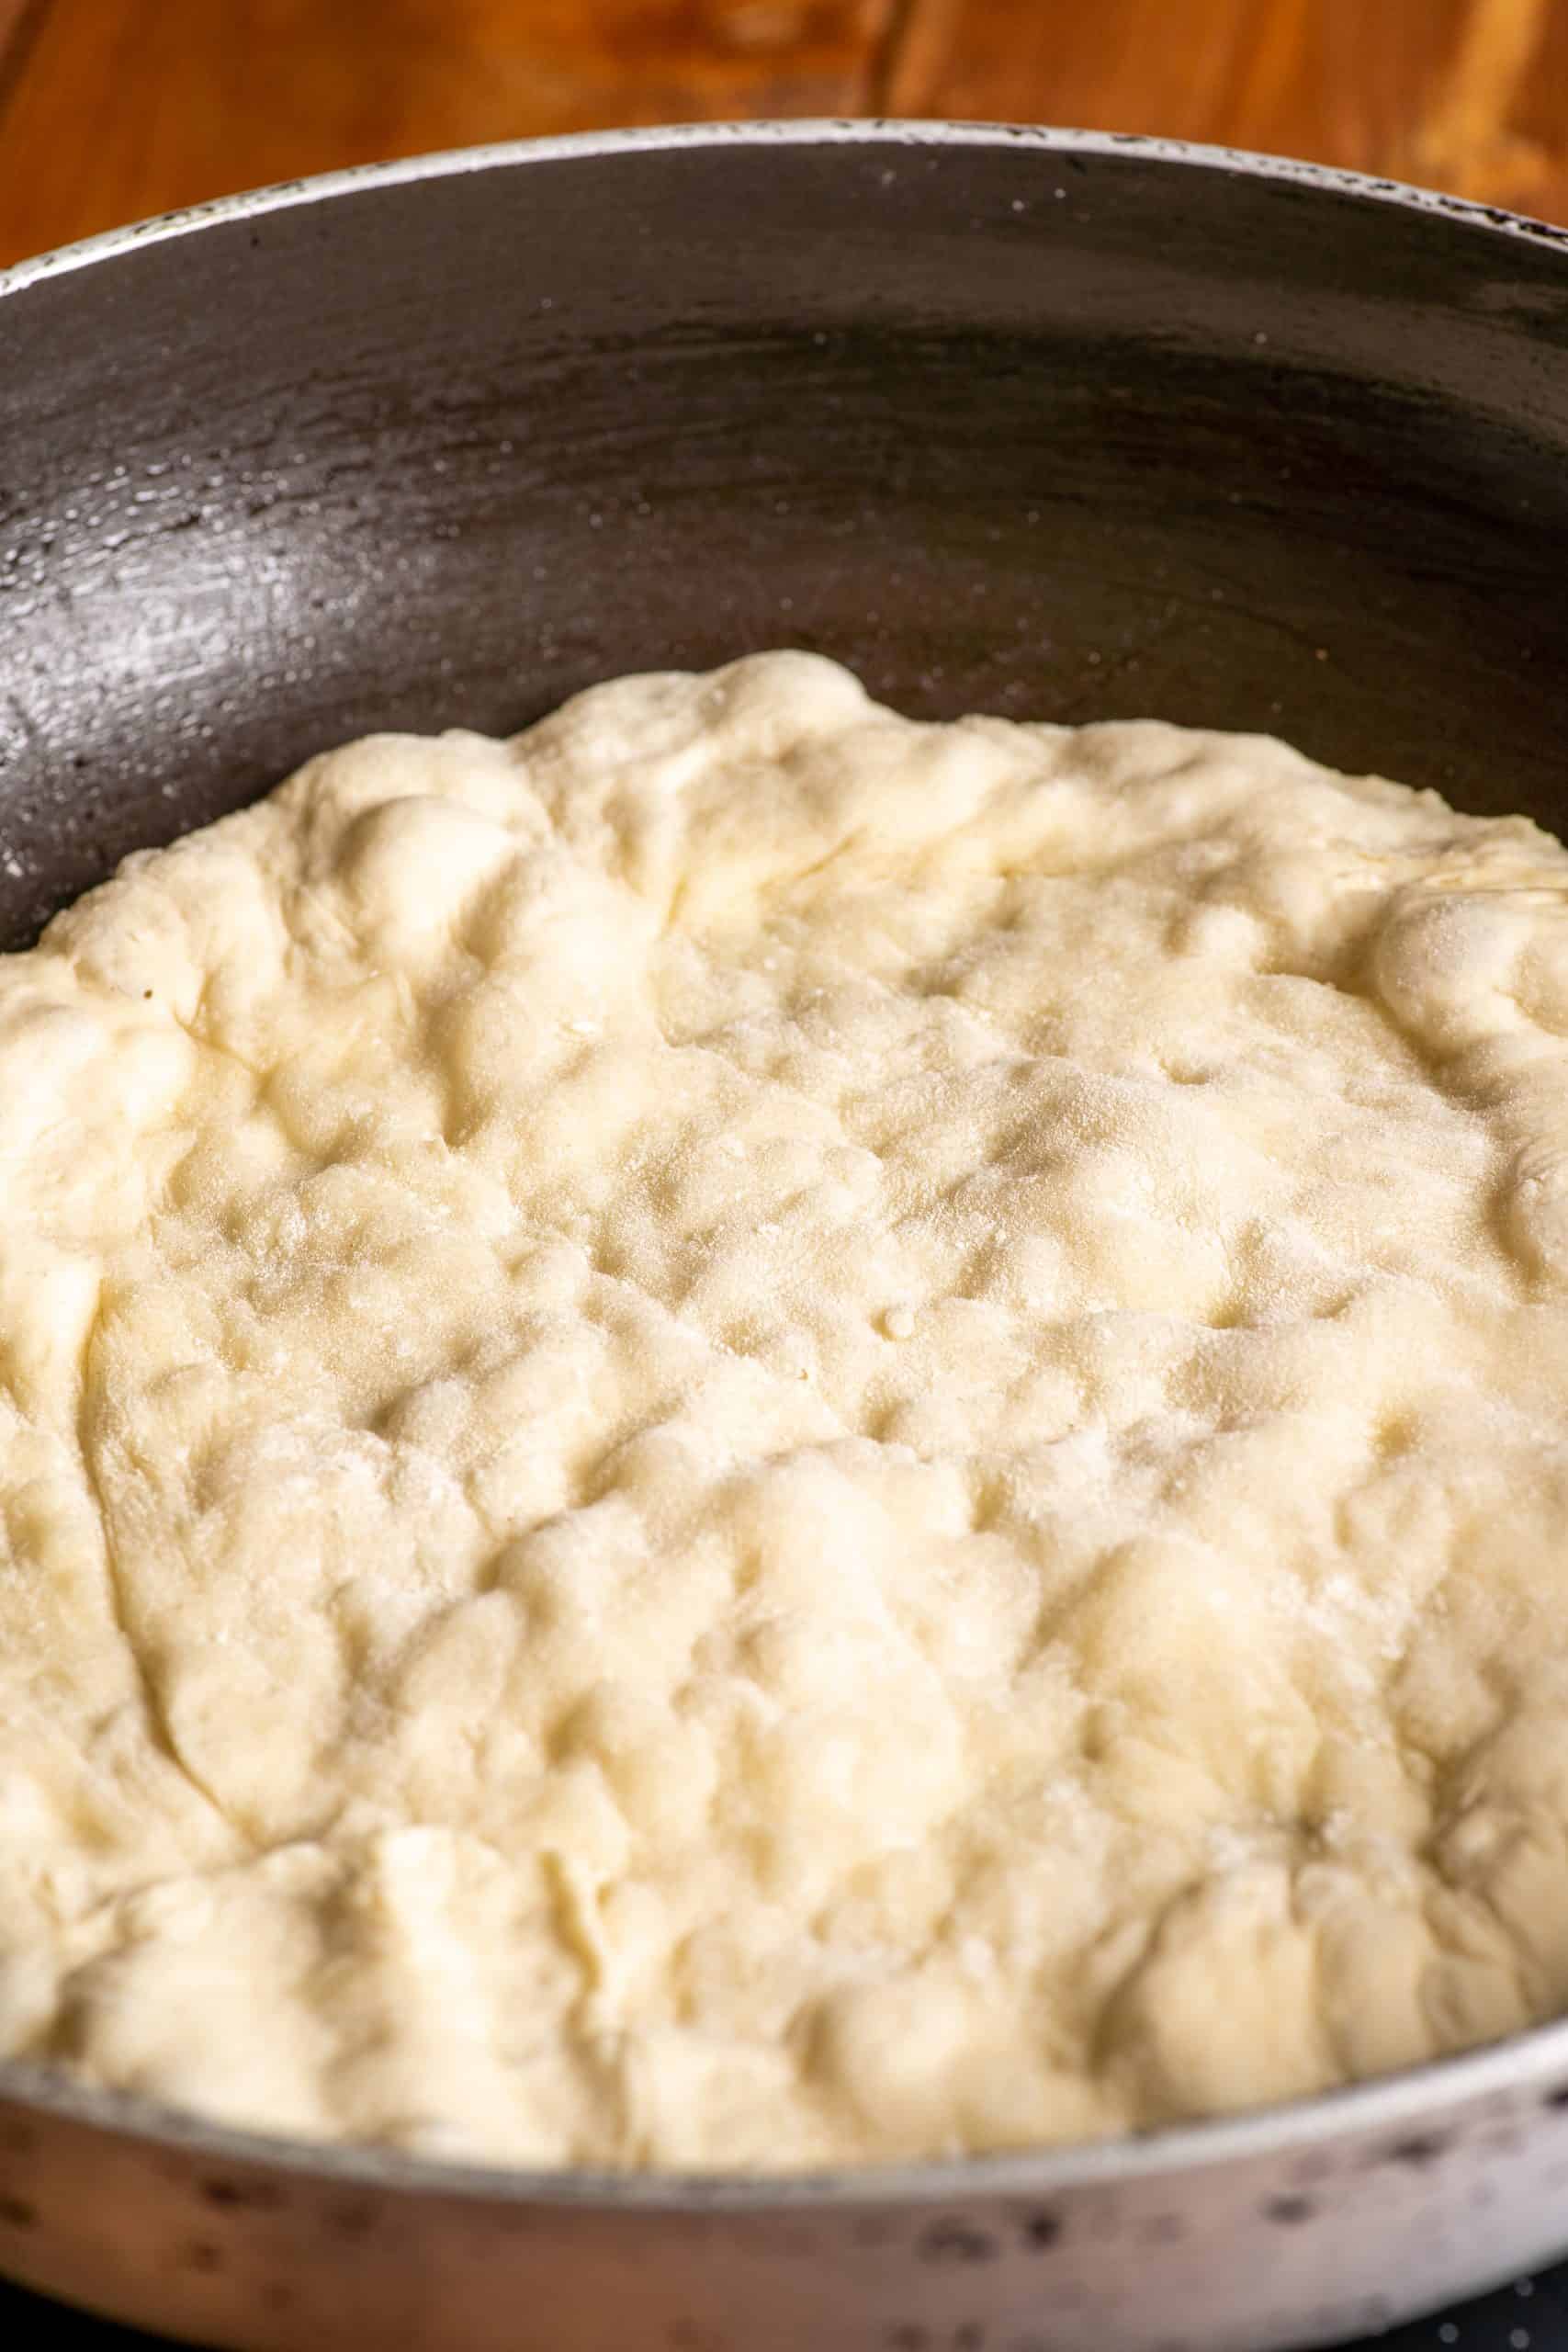
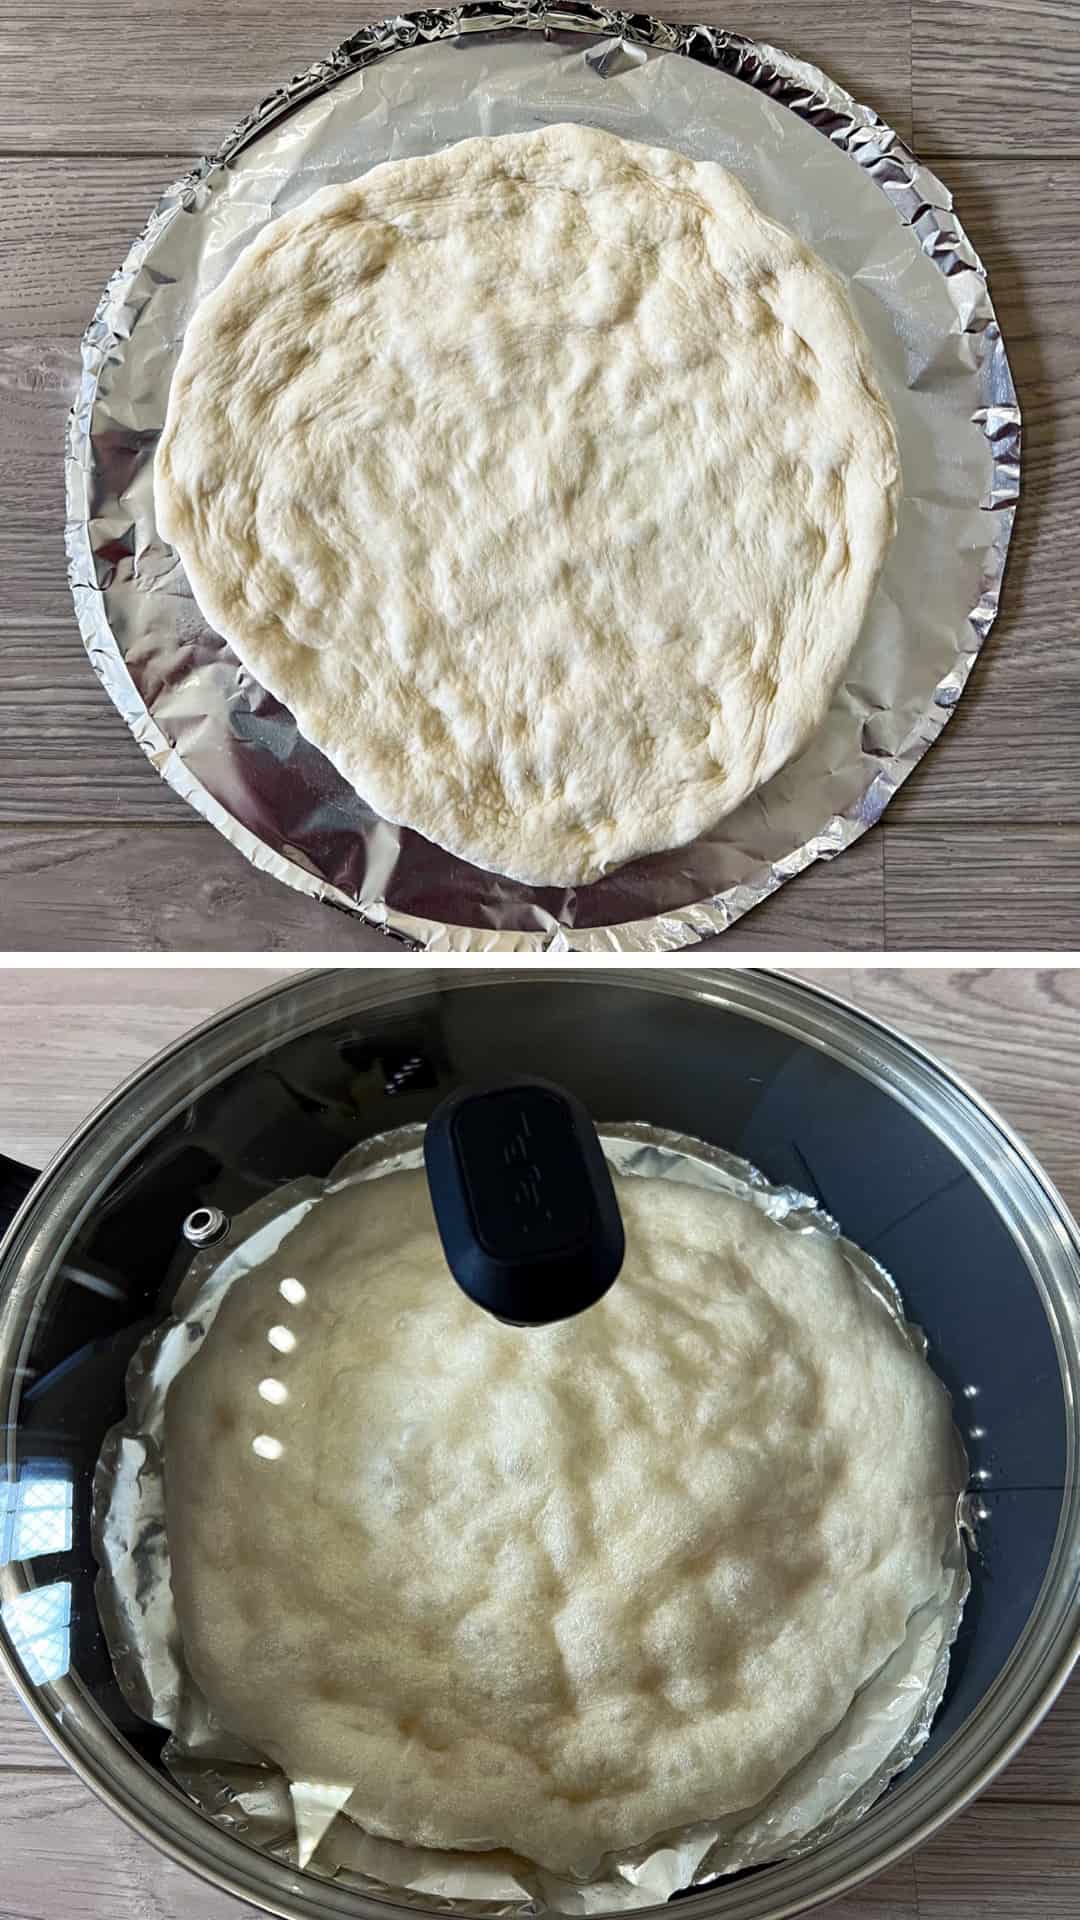
For the fluffier but slower way you’ll be using some steam! If you want an even fluffier pita bread, cut some aluminium foil in a round disk the size of your skillet, spread a generous sprinkle of olive oil on it, so the pita doesn’t stick to it and place your pita on it.
In your hot pan, add a splash of water and immediately place the aluminum foil with your pita on top of it and cover with your lid. The steam will allow your pita bread to slowly rise and steam cook.
Let it cook for ~12 minutes at medium-low heat before taking the lid off and turning your pita over to cook on the other side. Don’t lift it a moment sooner than 12 minutes as your pita will deflate!
You want to steam your pitta bread long enough for the dough around the air pockets to solidify, so when you take it out the shock from the cold air doesn’t pop them.
If your first pitta does deflate just let your second one cook for an extra 2-3 minutes and it will turn out to be perfect!
Whole wheat pita bread
If you want a healthier variation, you can make your Greek pita bread with whole wheat flour. Use 50% whole wheat flour and 50% bread flour and follow the same recipe for the rest.
The whole wheat flour will add a nuttier flavour to your pitta while at the same time making it healthier to eat!
No knead Pitta bread using a bread machine
Ever since I bought my bread machine it has been my go-to device for making pitta bread. Not only does it remove the hassle of kneading, but it also lets my pitta dough proof at the right temperature without me needing to monitor it.
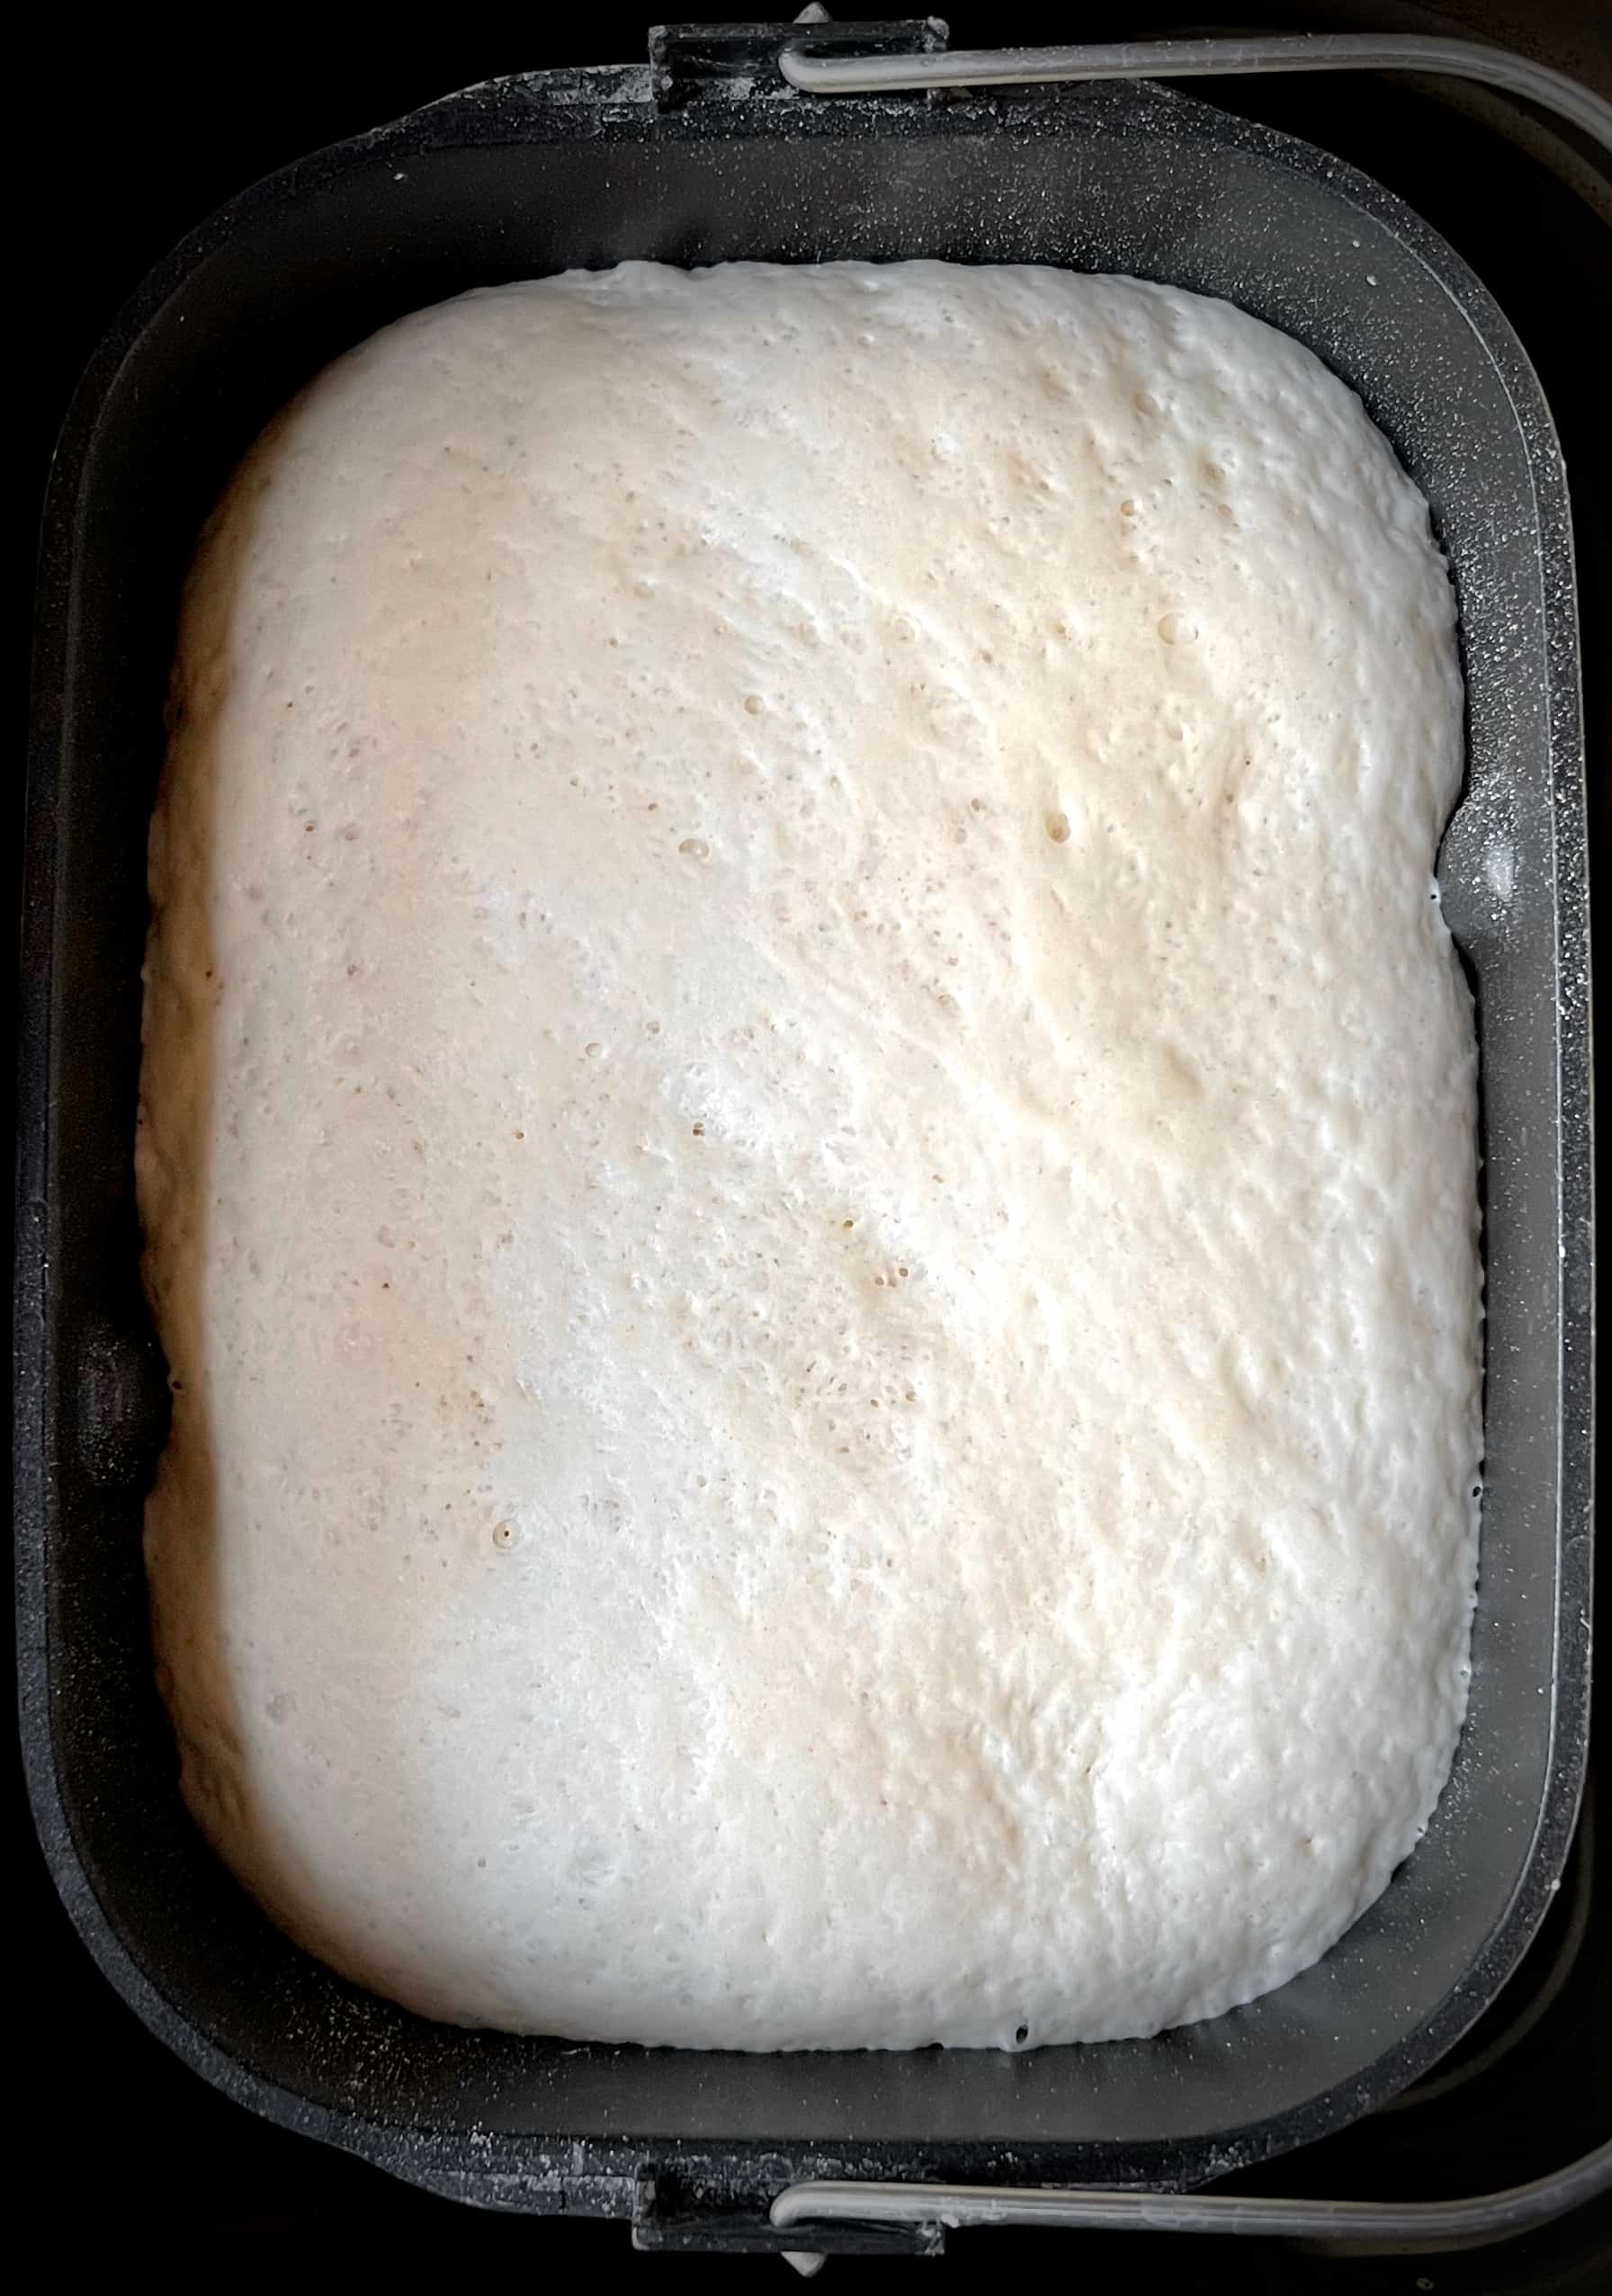
To make your no knead pita bread in a bread machine, simply add all the pita bread ingredients in the pan in this order: salt, sugar, flour, yeast, water.
The salt needs to be as far away from the yeast as possible, so it doesn’t stop it from activating. So, add your salt and sugar first and then your flour which acts as a buffer between the two.
After you’ve added your ingredients, set your bread machine to the basic dough cycle, and let it do its thing. Once it’s done, let the pitta dough proof in your bread machine for about 20-30 minutes or until doubled in size. Then proceed to shape and bake as per the recipe!
Making Greek Pita breads ahead of time
No one knows when a bunch of pitas may come in handy! Luckily, you can make your pita breads and store them in the freezer and serve them at a moment’s notice!
Cook the pita breads and let them cool down completely. Place them in ziplock bags squeezing the air out. When you want to serve, sprinkle with some olive oil, salt and dried oregano and heat them up in the oven for about 10-15 minutes straight from frozen. There is no need to thaw them! They will keep in the freezer for up to 2-3 months.
If you have pita breads that you haven’t consumed right away, you can also store them in an airtight bag the fridge. They will keep for around 3 days. To serve, just lightly brush with olive oil, sprinkle with a pinch of salt and dried oregano and heat them in the oven for a few minutes.
What to eat pita bread with?
Pita breads and souvlaki are a match made in heaven! So go ahead and indulge yourself with my favourite recipes below:
Also I absolutely love to cut up my pitas in quarters and dip them in some delicious home made dips! These are my favourite dips for you to try!
So go ahead give this homemade pita bread recipe a try! Enjoy!
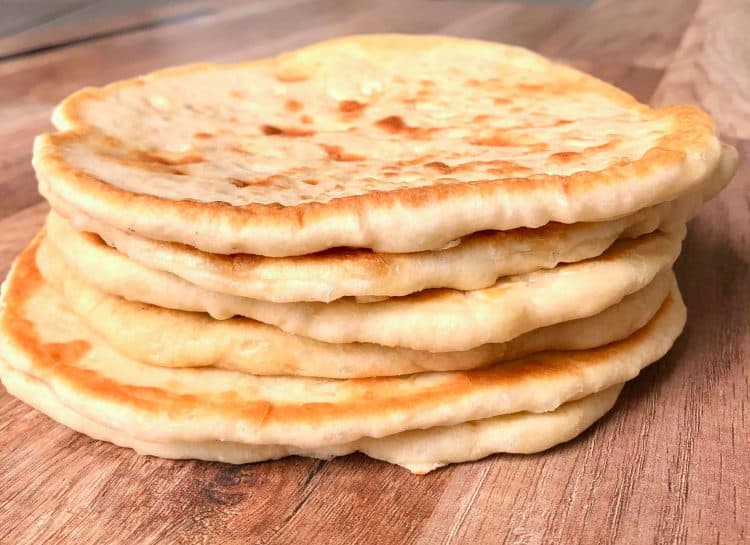
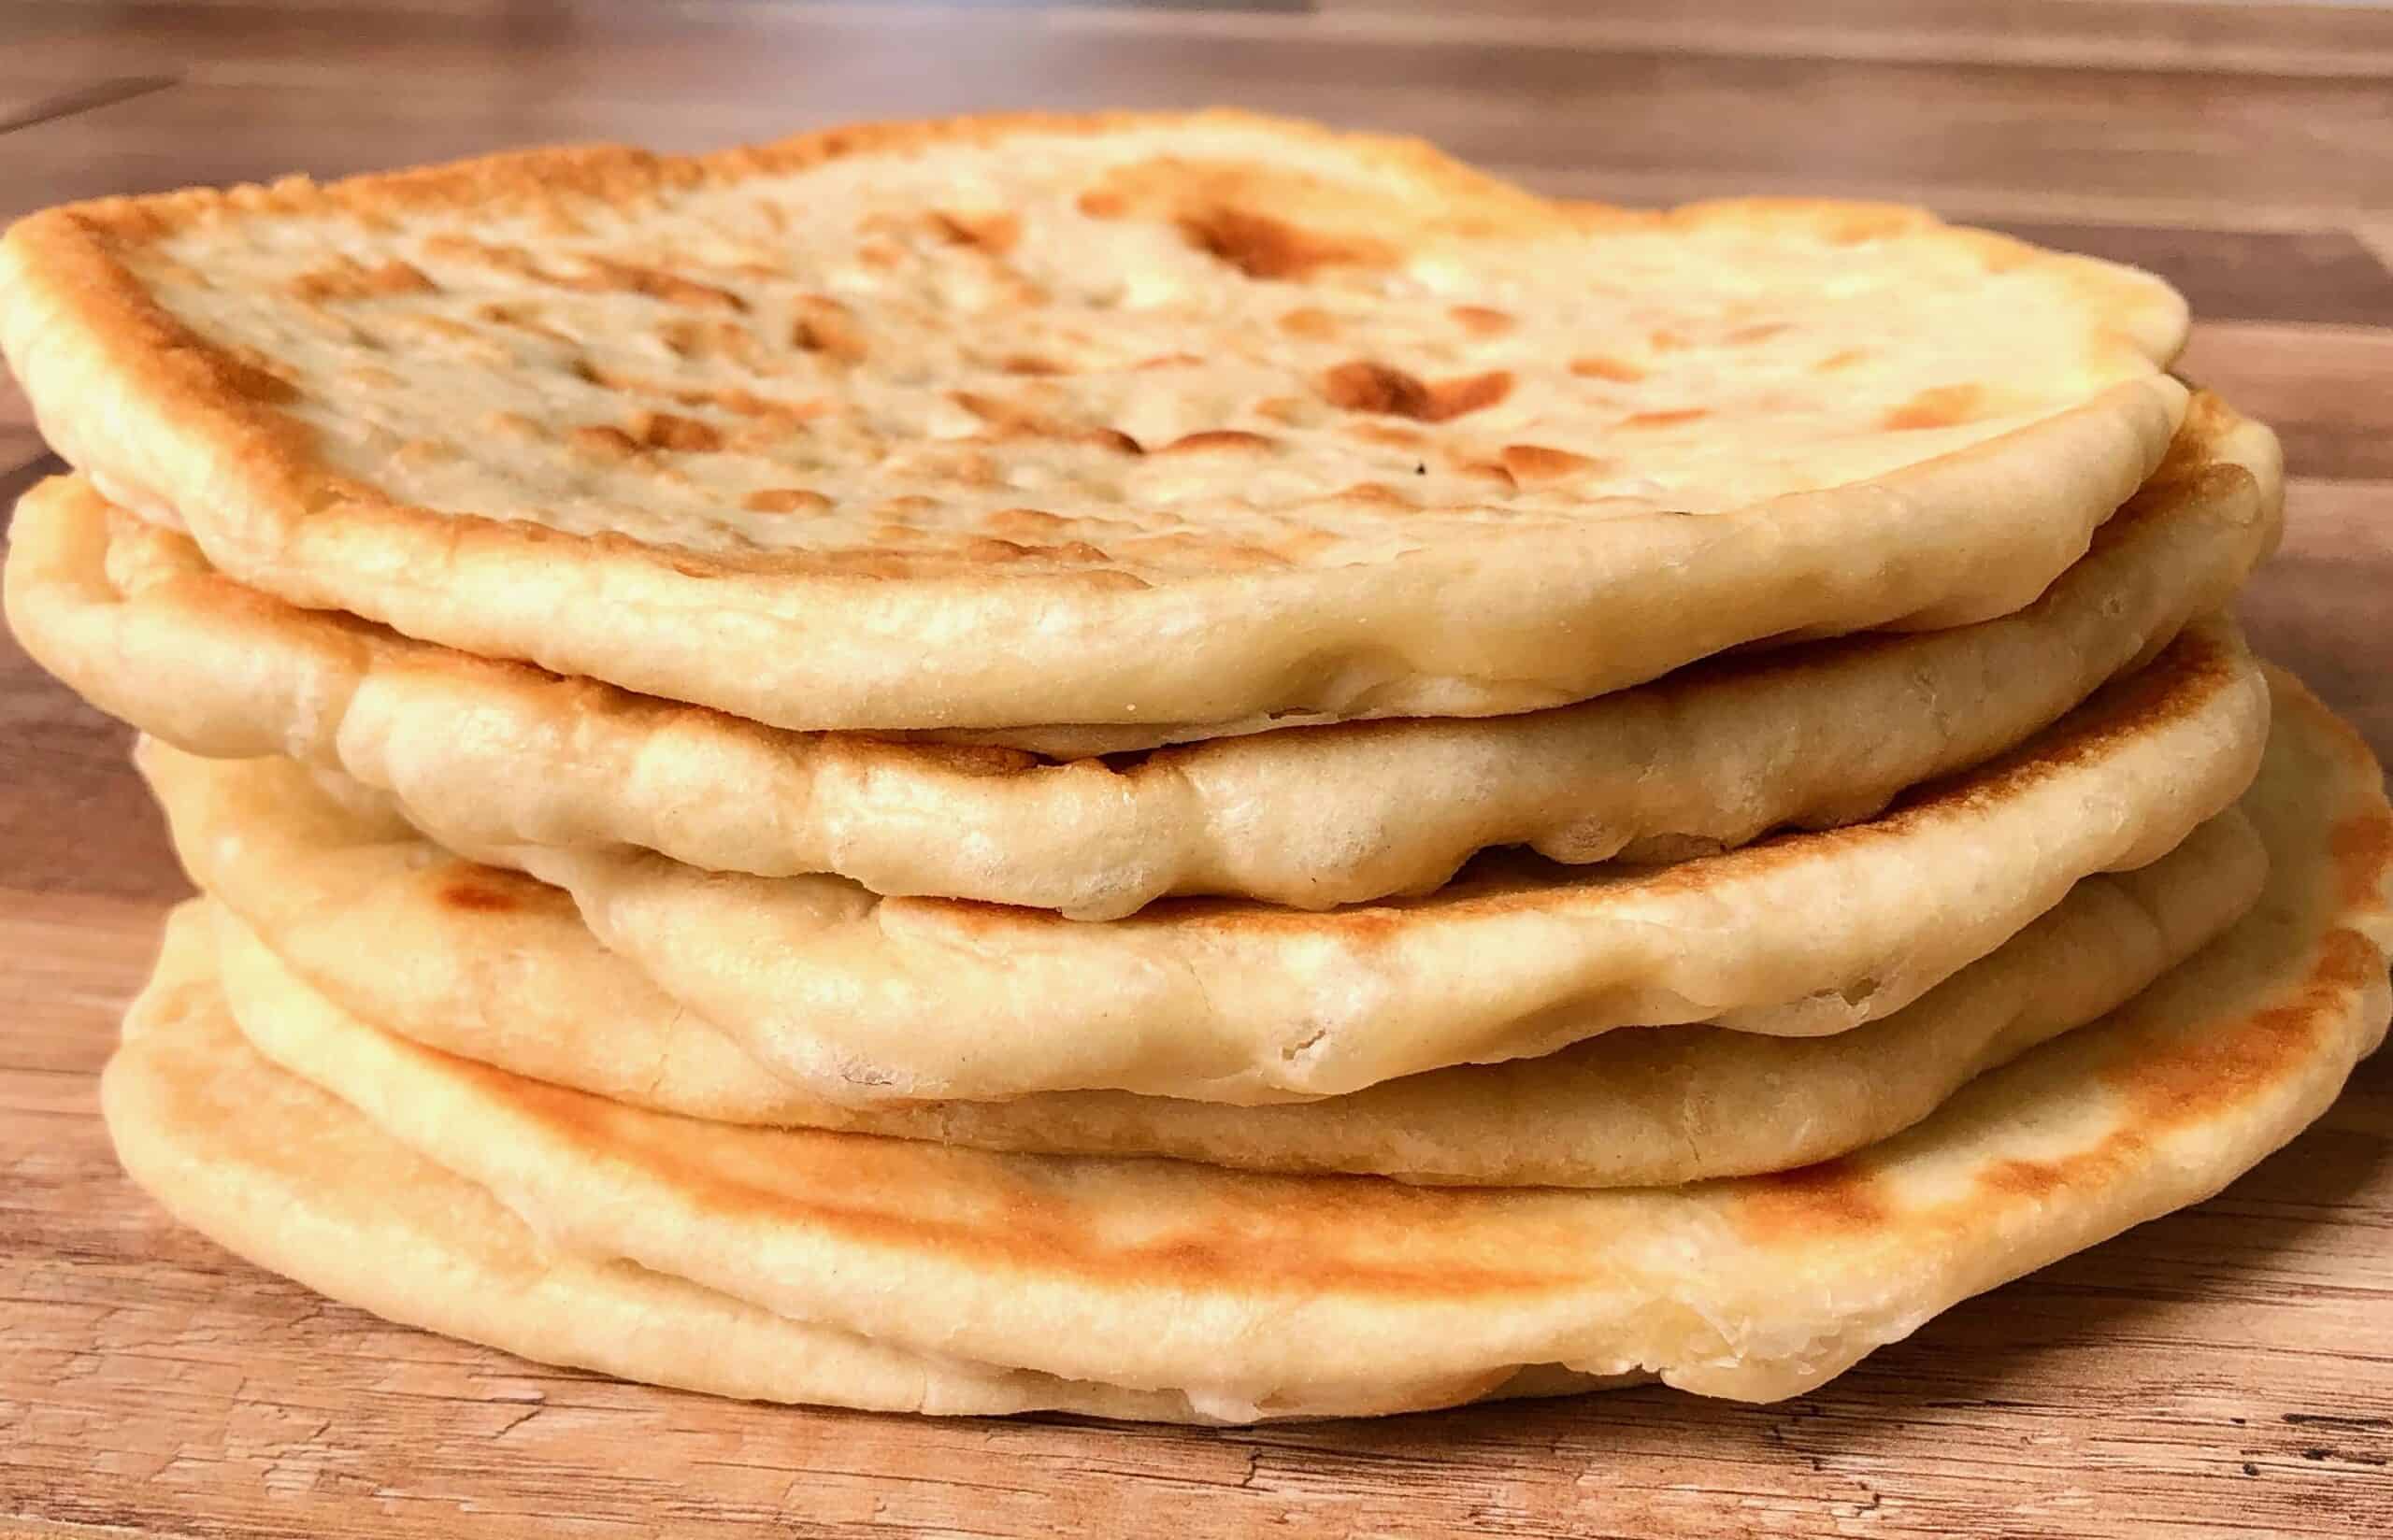
The easiest homemade Pita Bread recipe!
- Prep Time: 45 minutes
- Cook Time: 25 min
- Total Time: 1 hour 10 minutes
- Yield: 6 pita breads 1x
- Category: Breads
- Method: Fried
- Cuisine: Greek
- Diet: Vegan
Description
The very best homemade Greek pita bread recipe! And the best part, made with only 4 ingredients. Find out how to bake them to perfection with this super easy recipe.
Ingredients
- 500–530g (17-18.5 oz.) strong white bread flour or 50% white and 50% whole-wheat flour
- 360g (12.7 oz.) lukewarm (40C/ 104F)
- 3 tsp dry instant yeast
- 1 tsp salt
- 1 tsp sugar
Instructions
- To prepare this pitta bread recipe add in a mixer’s bowl the yeast, sugar and water and blend to dissolve the yeast. Set aside for 5-10 minutes until yeast froths.
- Add the flour and salt and mix using the dough hook for 6-8 minutes. Alternatively you could mix the ingredients by hand.
- Depending on the flour used, the dough may need a little bit less or more flour than this pita bread recipe calls for. After mixing for a while the dough for your pita bread should become an elastic ball and a bit sticky.
- When ready, coat the dough with olive oil, place in a bowl and cover with plastic wrap and a kitchen towel. Let it sit in a warm place, for at least 20 minutes or until it doubles its size. This is an important step for this pita bread recipe. The first proof makes the pita bread fluffy and soft. If it is winter, turn the oven on for a minute or two, until it’s a little warm, switch it off and then let the dough rise in it.
- Take the dough out of the bowl and gently deflate with your hands. Use just a tiny bit of flour to help you if it is too sticky. Split into 6 evenly sized balls around145g/ 5 oz. each.
- Let the pita bread balls rest for 15 minutes before shaping. This is the second proof and will allow your dough to relax and become easier to shape.
- To form the pita bread, you can either use a rolling pin, or stretch it with your hands, about 20cm in diameter. A rolling pin will make a crunchier pita, while hand stretching a softer, fluffier one. If the dough springs back, set it aside for a few minutes to rest and then continue rolling again.
- For a more traditional look on your pita bread, press the dough firmly with your fingertips forming dimples or use a fork to make some holes on top.
- For a faster baked pita, heat a non-sticking frying pan to medium heat and add just a little bit of olive oil and wipe off any excess. Bake each pita bread for about 3 minutes on each side, until slightly coloured and still soft. If your pan has a lid, place the lid on while baking them to keep the moisture in.
- For a fluffier pita use the steam method. Cut a piece of aluminium foil to the size of your pan. Generously sprinkle and spread some olive oil on it. Shape and place your pita on the foil. Pour a splash of water (~2-3 tbsps) in your plan over medium heat – it should start steaming immediately! Place your pita immediately in it and cover with the lid. Let it steam for 12-15 minutes. Take it out, flip it over and cook for another 2-3 minutes on the foil.
- To give it more colour, when you flip your pita bread, push it lightly with a wooden spoon on the pan.
Nutrition
- Serving Size: 1 pita
- Calories: 308kcal
- Sugar: 0.2g
- Sodium: 4.7mg
- Fat: 0.9g
- Saturated Fat: 0.1g
- Trans Fat: 0g
- Carbohydrates: 64.1g
- Fiber: 2.6g
- Protein: 9.1g
- Cholesterol: 0mg


Hi there. How would you adapt the recipe if you didn’t have a mixer and you were making the dough by hand?
Same recipe, will just need a bit more kneading by hand to get the gluten to develop 🙂
Lindy you have answered your own question …. you would use your hands like I do even thouogh I do have a stand mixer, much more fun using your hands 🙂
can you freeze this bread
Technically, from a chemistry perspective, the bread is already a solid at room temperature so it is, at least by some measure, “frozen”. Melting or sublimating bread might be theoretically possible but not practical.
To answer the question you are actually asking: Storing bread, including this pita bread, at temperatures below the freezing point of water (e.g. around -20°F) will inhibit microbial growth and extend shelf life.
In a blind taste test, in most situations, bread that has been chilled below 32°F and then reheated will be difficult to differentiate from bread that has not been chilled.
However, most people will say, in general, that fresh baked bread tastes better. “Taste” isn’t just the chemical reactions on taste-buds; The whole taste experience in it’s entirety is very subjective, so these people not “wrong” at all.
Freeze for utility, but always serve fresh when looking to impress.
I bet you’re a tonne of fun at parties
So long, long, LONG story short: yes
Oh my oh my. This is what gives chemists, or more likely chemistry students a reputation as less than exciting, or worse, condescending. You could have just answered the question that was asked. We aren’t all like this, I promise.
If you want to sublimate your pita bread, just put it in the freezer without any wrapping and leave it there. Sublimation is just going from a solid directly to a gas without melting. Freezer burn is a fine example.
Love this. So nice to see someone with a serious answer. It’s not condescending – it’s interesting. Thank’s Bill.
ok nerd
Thanks for this, i wish there were more people like you providing fully comprehensive answers which helps us to learn! 😀
Thanks, Bill, for your good humored and educational answer!
As a chemistry student I swear to you not every chemistry student is like this
Actually, what you are freezing when you freeze bread is the moisture (water) in the bread. Bread isn’t a solid. Having said that, low temperature also slows other processes, from enzyme activity to oxidation—especially if the food is well wrapped. So, freezing bread does work well to prolong its shelf life, and most breads freeze beautifully.
Actually, what you are freezing when you freeze bread is the moisture (water) in the bread. Bread isn’t a solid, it’s a mixture or compound. Having said that, low temperature also slows other processes—from enzyme activity to oxidation—especially if the food is well wrapped. So, freezing bread does work well to prolong its shelf life, and most breads freeze beautifully.
Woah, watch out guys, we found the condescending “explainer guy” typical redditor in the wild in a recipe website!
Just tried making these with 14g of fresh yeast, as it’s what I had at home, and with 10 minutes of kneeding by hand. They tasted lovely, but were a bit undercooked on the inside, despite looking perfect on the outside. Might have to play around with the cooking temperature a bit, but I will definitely make them again! Thanks for the recipe 🙂
Next time try covering the pan with a lid. The steam will help it cook on the inside 🙂
I would love to try these and wonder how reducing the salt would change the bread … I am on a really low sodium diet and try to reduce it wherever I can!
You can not eliminate the salt completely. The salt stops the yeast from growing (rising) to much. Yeast is a living entity it lives in the warm water, (Which should be around 100-110 F or 40 Celsius/Centigrade) and feeds off the sugar. If the water is too hot it will kill the yeast and your bread will not rise. You could easily reduce the salt to 1/2 teaspoon or 2.5ml (milliliters). I think that the full teaspoon is for taste more than anything else.
Thank you so much! Reducing the salt in anyway I can is always helpful and I appreciate your thoughtful answer and advice.
Spot on, the salt will slow down the yeast and make it more “bread-y” instead of more fluffy, like a cake. You could reduce the salt a bit and use a tiny bit less yeast and that should be fine..
Hi there,
I don’t want to add sugar to this will this still work?
Thanks 😊
Yes it will. You could also add a couple of teaspoons of honey if you prefer something more natural.
Gooey dough, even after adding three more ounces flour
Tried this recipe after returning from Greece on holiday. It was simple to make and they were delicious. thanks.
Ah thank you! so glad you enjoyed it!
Eli…..Thanks a LOT for the scrumptious Pita recipe! I’m so glad you
put it ‘out there’…Is it possible to put the measurements in teaspoon, tablespoon, Ounces and Pounds next time? It would be nice! Thanks Linda.
Just tried these – didn’t rise as much as I thought they should although I left them to rise in a ‘proof’ setting oven for 3 hrs. … tasted OK though. Not the same consistency and taste as store bought pita. A bit heavier.
I think you may have used the wrong type of yeast. My guess is the one used here in this recipe sounds like ‘Quick Rising Yeast’ which is a stronger yeast you can add to the recipe with out proofing. Then you proof the bread for a short period of time and cook. If you have used ‘Dry Active’ yeast the process will be much longer with more steps and the proofing of the yeast and the bread.
Spot on – its the fast acting yeast that I’ve used here. Its the one most commonly available at supermarkets 🙂
These are delicious! I’m sure you could freeze them, no problem. Be sure you roll them out thin enough; they’ll puff up just enough as they cook. They’re not pita-pocket style bread, but flatbreads you can make into a wrap/sandwich, or eat in their own. I subbed about 4 oz of whole wheat flour for white, for a heartier and healthier bread.
These were bl00dy delicious. I made them to go with the chicken souvlaki. My scales acted up, and I ended up using 7g of yeast, but it wasn’t a problem. Such a quick, simple flatbread. Definitely one I’ll use again and again
I ❤️ this site! I’m new to Greek cooking but I’m loving it. I made the pita bread for the first time this week to go with the Chicken Souvlaki recipe. They were quick and easy to make but did come out a bit doughy. I’m sure with a bit of practice, I will get better results in the future. A new family favourite ?
this is my first time how do I go about making great pita bread at home thanks
Our dough is super sticky – despite adding lots of flour – so we thought.
Maybe we didn’t knead it enough…
We thought we’d followed the recipe to a T – but novice chefs here 😂
Any advice welcomed
Thanks a mill
I don’t have a kitchen scale or metric measuring cups. Is it possible to convert measurement to cups? A liquid cup is 8 oz. I don’t know what a cup of a dry ingredient like flour weighs.
Maybe this can help you? https://www.mygreekdish.com/unit-conversions-useful-substitutions/
This is the worst recipe ever. Followed every instruction and measurement and they turned out horribly.
You just don’t know how to cook
I’ve made quite a few times the pitta breads and the recipe works every time. I’ve used just plain flour and omitting the salt does not change anything. I’ve made a massive batch on Xmas day for friends and family and they all disappeared in a matter of minutes! An absolutely “must” to be used for dips or mopping up stews or currys. As for a comment comparing the “shop” pitta breads and these ones, to say that nothing can be compared with any food made at home. Finally, spelling errors? Give me a break! Some people have a serious sad life. Thank you Eli for one of the most reliable and tasteful recipes around.
How much water would I need to proof active dry yeast?
these are marvelous – make frequently and store in freezer for when needed – thank you for a great recipe!!
How did you calculate the calories per pita please.
Just add up the calories used in the whole batch and divide by number of pitas. I used 500g all purpose flour, so that is 1820 calories. 35 calories in 3tsp of instant yeast and 16 calories in 1 tsp of sugar. So the total recipe is 1871 calories. I divided the dough by 6, to make 6 pitas therefore 1871/6= 312 calorie per pita
I love this recipe! There is a typo in the recipe that you may want to fix. it says oita instead of pita. keep on cooking and getting more fans!
how big is the glass of water – the ones in my cupboard range from tasting glasses through pints to champagne flutes ? Please can you give a qty in ml?
250 ml for each glass/cup, so for this recipe about 375 ml give or take a few.
Hello, For the water, you have said “1 1/2 glass”. Do you mean 1 and ½ cups (US) of water at 40 C temperature (104 deg F)? Thank you.
Can I use whole wheat flour? Does that change any measurements? I am making your chicken souvlaki and tzaziki tonight! I toured Greece in 2018 and the food was one of my highlights of my trip and of course the people, beaches and sights! Best trip ever!!!
Yeap you can use whole wheat flour. You may need a tiny bit more water as whole wheat soaks it up more. Check by feel so it’s not too sticky and add if needed!
I forgot to ask, can I bake these instead of frying? Trying to eat healthy.
Hi Dawn, ideally you should try them but you don’t use much oil at all, just barely enough to glaze the pan so they are not unhealthy at all 🙂
Great recipe and instructions 🙂 .. I’ve had fantastic results with it each time. I use standard white AP flour and found that it did warrant the full 530g of flour rather than just 500g…much less than 530 and the dough is really frustratingly sticky to handle, but it did still produce great result. Thanks for sharing x
Thank you Jamie, so glad you liked it!!
I just made a dozen thinking that would be good for a few days but forgetting that I had a house full of gannets
and my next door wants a dozen for tomorrow
Hi these were a big hit. Reading the reviews after the fact I realized I forgot the salt. Did not seem to matter. Can I double the recipe? Thanks for this new family fave. I also loved your chicken souvlaki and saw this recipe suggested as well.
Hi Terry
So glad it worked well for you! Salt would give it some extra flavour but can definitely be made without! Of course you can double the recipe – click on the 2x button next to the ingredients 🙂
If using dry ingredient conversion to cups but sure to use enough flour. 1 dry cup is about 4.41 ounces – so you need almost twice the number of cups compared to wet ingredients cups which are 8 oz. I’m in the middle of preparing so hoping that adding more flour after dough rises, will be okay.
You need about 70% of the weight of the flour in water – the dough should be a bit sticky when handling. Its a higher hydration dough to keep it soft, so going 50-50 may make them a bit tough.
Hi, I’m in the UK. Is it ok to use a bread maker to knead the dough?
Do you use strong bread flour or plain flour?
How thin to do roll the dough out?
Sorry lots of questions. My first attempt looked ok but the pita wasn’t light and fluffy.
We’ve just come back from Greece and I’m trying out some of your recipes.
Hi Nat, I use bread flour (strong flour) but plain can work as well (they will just be a bit softer). Roll the dough as shown in the pictures, about half a centimetre thick. I also use on occasion a bread maker to knead the dough when I don’t want to get the stand mixer out, it works like a treat 🙂
I’ve made these at least 3 different times, and this last batch was earlier today using Jovial Einkhorn all purpose flour as it’s supposed to be doable for folks with gluten allergy. These turned out better than I had hoped, just as amazing texture as regular flour (I discounted the water by 10%), and the taste was phenomenally delicious! What a huge relief.
Great recipe! I may have under kneaded a bit but they still turned out spectacular. I added the least amount of flour and it wasn’t quite enough so I threw in about 10g of vital wheat gluten and it came together really well!
Excellent! It doesnt need too much kneading but just enough for the dough to become elastic. The added gluten would have helped if the flour was a bit on the low side 🙂
Just made these for the first time and it won’t be the last. So simple and delicious. Also made very easy by using a mixer. Thanks for sharing.
Your welcome Julia! So glad you loved them!! Indeed they are super simple to make, I make them almost every week 🙂
The article says:
“Let it cook for 15 minutes before taking the lid off and turning your pita over to cook on the other side. Don’t open it a moment sooner than 15 minutes as your pita will deflate!”
But then the instructions say:
“Fry each pita bread for about 3 minutes on each side, until slightly coloured and still soft.”
Is it 3 minutes or 15 minutes?
Thanks for the recipe 🙂
It depends whether you use the steam method or not – if you steam the pita breads then you’ll need 12-15 minutes before lifting the lid. If you’re not steaming them its 3-5 minutes on each side. I’ve updated that in the recipe so its more clear 🙂
Thank you for the quick response!
No problem at all!! 🙂
Says 1tsp sugar and salt but you clearly use a lot more by me eye, is this correct?
Found this pitta recipe today and, made it today. Easy and simple! Makes a great pitta! Most time is spent during the cooking process but worth it. I miss the days of my youth, when my Dad (USAF) was stationed in Greece (was there during the mid-60s coup). Great food! Too many stories to tell from the three years there. Anyway, great, simple pitta recipe! Thanks Eli!
Your welcome David and so happy its brought you back fond memories 🙂
Hi Eli,
Have you tried using active dry yeast for this recipe? Will the proofing times change?
“discover my tips and tricks to make this Greek flat bread to perfection, my video showing you how to make it” … eh, not sure where to find your video whowing how to make it. I looked on your YouTube channels but it’s not on their either. Do you actually have a video for this and if so do you mind sharing the link to this as I’m interested to see you make them both fried and steamed.
Also, I don’t like using aluminium foil. Is there another way you can suggest to steam them?
Hi there, just made these for the first time and so simple and delicious.
Tried this recipe and my family very happy. . It was simple to make and they were delicious according to my mum.
Can’t wait to try to this! Is making them a day ahead of time okay? What is the best way to store them overnight?
These turned out amazing! Your instructions were explicit and easy to follow. I’m not great at working with yeast, breads… but these are better than nice restaurant type!
Thanks
I should have read all the comments before measuring. I have no idea how much flour I added. I used my kitchen scale set to grams, and the “dough” was actually still liquid after adding 530 grams. I kept adding until I had a sticky dough. I hope they come out right in the end!
Followed recipe exactly as stated and wow! They turned out wonderful, thank you for my new go to for pita bread.
Just made them today and although I struggled a bit with the initial kneading process, I added more flour as was mentioned in the recipe. This is the best pita bread I ever had. So easy to make too.
Hi Eli After 12 minutes steaming, do I flip it over and cook a bit more?
thanks
Janice
Correct, it needs 2-3 minutes flipped over 🙂
Hi i made these and they were delicious but so sticky and hard to shape what did I do wrong or how can i rectify this ? Thank u
What is the best way to store them. Sorry if I missed it
Fabulous! Made this to go with homemade chicken gyro and homemade taziki sauce. Felt like I was back in Chicago. Thank you for this easy and cheap recipe.
Sandhya Singh, who considers women’s development as the cornerstone of the country, is a social worker, who is always ready for the development of people, region and nation.
https://www.sandhyasingh.org.in/
I made these to go with homemade chicken gyro and they turned out great! Be forewarned these are a labor of love, but they are worth it. These pitas are infinitely better than any store bought pita I’ve tried. Also, if you’re on a budget (who isn’t these days), this are also much cheaper than buying pita.
Some of your instructions are horrendous and make no sense.
Step 9 you heat up a frying pan but then you say to bake the pita. Does that mean putting the pan into the oven? What temperature? You also may want to add a caution that the pan handle and lid be oven proof. If they’re being cooked in the frying pan that’s not baking (Britannica Dictionary definition of BAKE. 1. a : to make (food, such as bread and cake) by preparing a dough, batter, etc., and cooking it in an oven using dry heat.)
Step 10 you cut and put foil into the pan and oil it. Then you put the pitas into the foil and add water to the pan (instructions state “plan” (sounds like you’re boiling the pitas). But then you say place your pitas on the foil which has already been done? How are the pitas steaming if they’re sitting in water?
I like the ingredients but I think I’ll follow someone else’s instructions. The one thing I’ve seen in just about every video on making pitas is to tap them with a spatula to encourage puffing if they’re not doing it on their own. If they don’t have that signature pocket they’re not pitas.
Are you serious Dave?
right. There’s no oven temp in the whole recipe.
I’m making this bread now. The first round burnt on the bottom. I just poored some water on the pan. I never heard of a glug of water so I asked Alexa which said 17 ozs. I tried that and have a gooey, uncooked looking round. What do you really mean with respect to the water?
The dough worked up so beautifully. However, the recipe states “Pour a large glug of water in your plan over medium low heat – it should start steaming immediately!( It didn’t. it was too much water.) Place your pita immediately in it and cover with the lid.” I’ve never heard of a glug of water so I asked Alexa which said 17 ozs. I tried that and have a glutinous, looking round. I’ll go back and watch the video.
Oh that is too much water! What I mean is a good splash, something like 2-3 tablespoons at most, to generate some steam. I’ve updated the recipe to clarify it.
Just a quick, pedantic note, Eli:
It’s “You’re” welcome. (a contraction of “You are.”)
“Your” is used to indicate possession, as in “Your recipe” or “Your pita bread.”
Cheers from the U.K.
Thank you, Eli.
I did it with 50/50 wholewheat and plain flours and it turned out great.
My other trusted recipe uses a lot of olive oil, but with the ridiculous cost increase of that liquid good I was looking for a replacement that didn’t need it. This was perfect. Thank you.
Is there a way to view the recipe and not be utterly bombarded with pop up ads? I can’t look at the screen for 5seconds without 3 pop-ups covering everything.
These were sooo good!! My entire family loved them. They were really easy to make and I ended up making another batch right away because we loved using them for sandwiches. They turned out soft and delicious. I’m making more this weekend to make pizza with! Thank you!
I once tried making pita bread at home instead of using factory-made pita. Believe me, it turned out just like fresh roti! Making the dough by hand is an exceptional experience, and the result is absolutely delicious. Homemade pita doesn’t feel overly dense like factory-made pita, where one piece can leave you too full. Homemade is on another level entirely!
Can I make this the day before?
Unfortunately! When you use the double the recipe or the triple the recipe it converts everything but the right amount of flour … I don’t know if mine will work or not … Didn’t realize it until I was trying to mix a very wet dough … adding so much flour … not sure how this will work …
Great recipe. I made beautiful, perfect pitas and it was my first time. Thank you Eli
I think I need to add a little more flour next time. Been making high hydration doughs and this was just a bit too soft. Found I had to use a rolling pin since the first couple were too thin in the middle after they stretched more putting them into the pan. Smells wonderful. All issues were operator error. Thanks for the recipe.
Okay, I made it and to be honest I’m pretty happy how it came out for the first time. The dough was initially hard to work with, really sticky, but I gradually added more flour until I could work it. So as a result, I would probably add more flour initially, but the final result was quite good so I’m happy.
Thank you, Tom
I would have loved to have tried this recipe, but sadly the insane ad pop-ups that can not be closed is making it near impossible to follow on my phone. I couldn’t even write this comment without the page scrolling back up to ads. Shame.
Followed recipe exactly and it is FANTASTIC!